Blog

  • Holographic Nail Glitter Set for Seasonal Nail Trends

    Holographic Nail Glitter Set for Seasonal Nail Trends

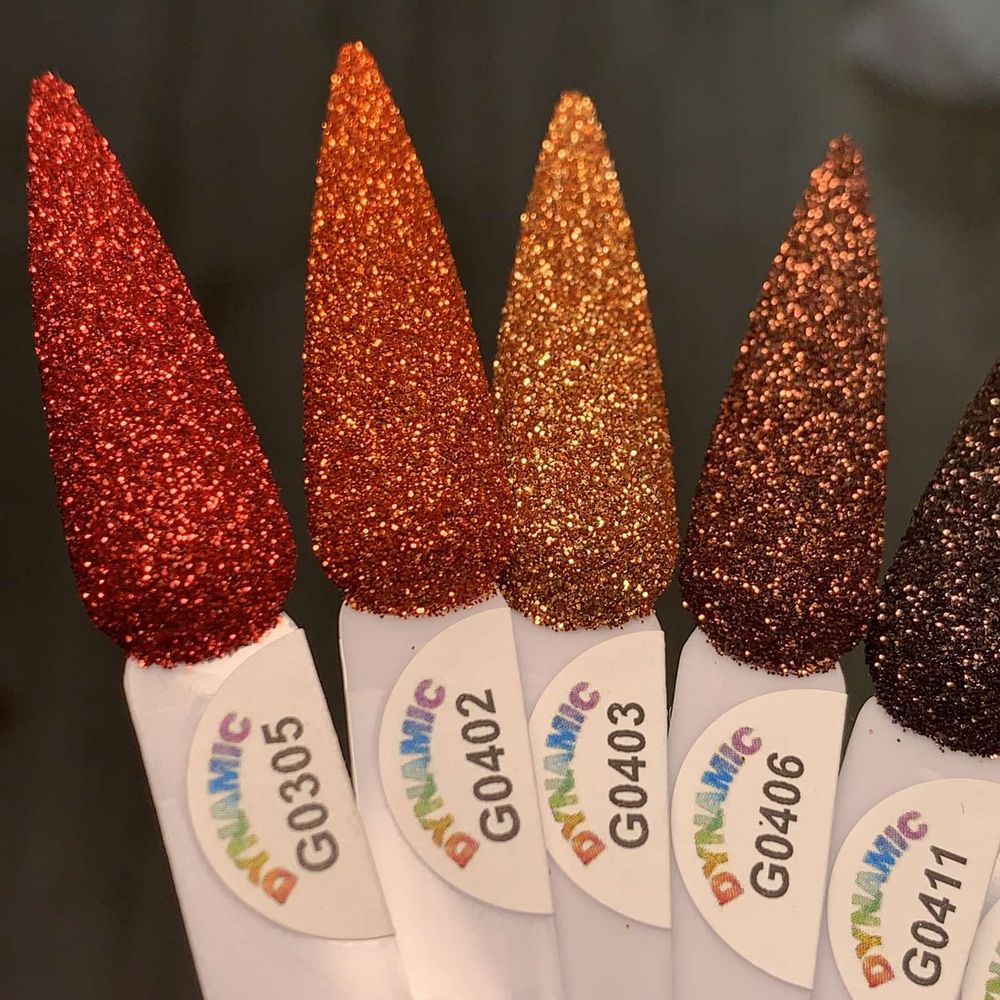
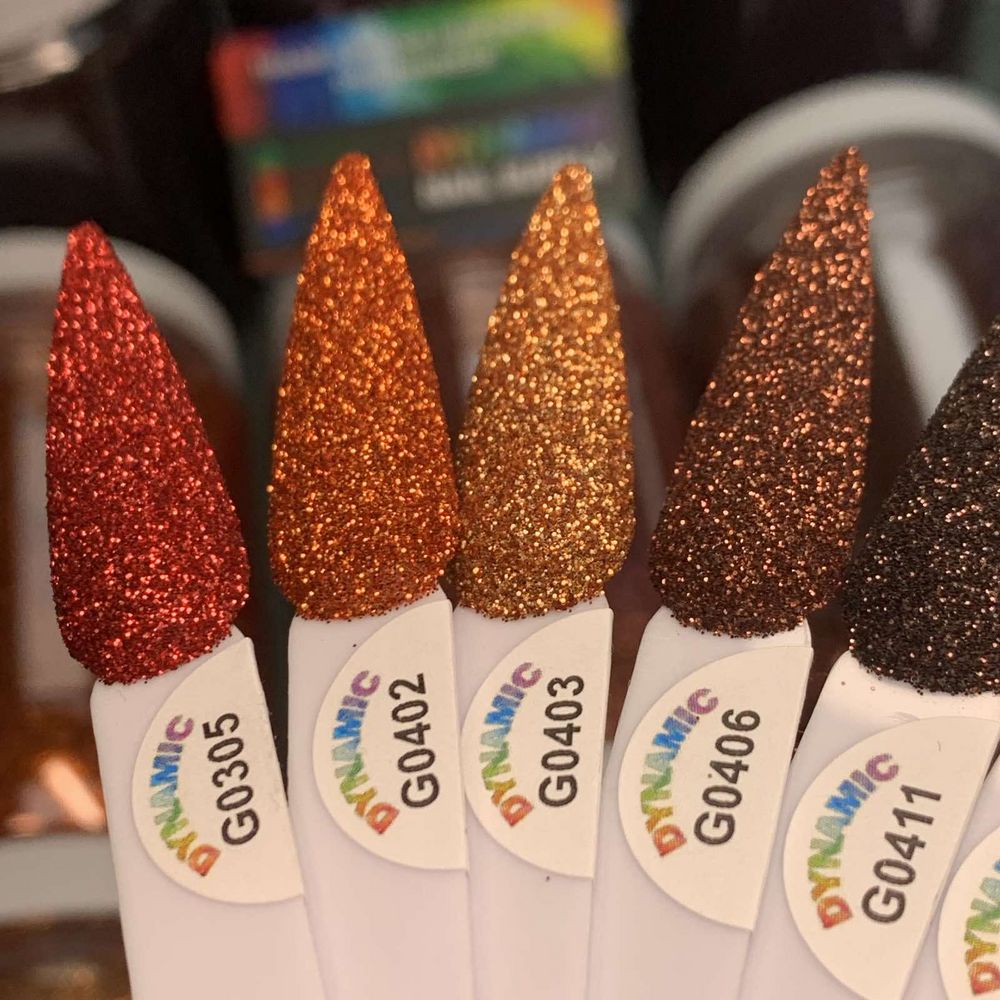
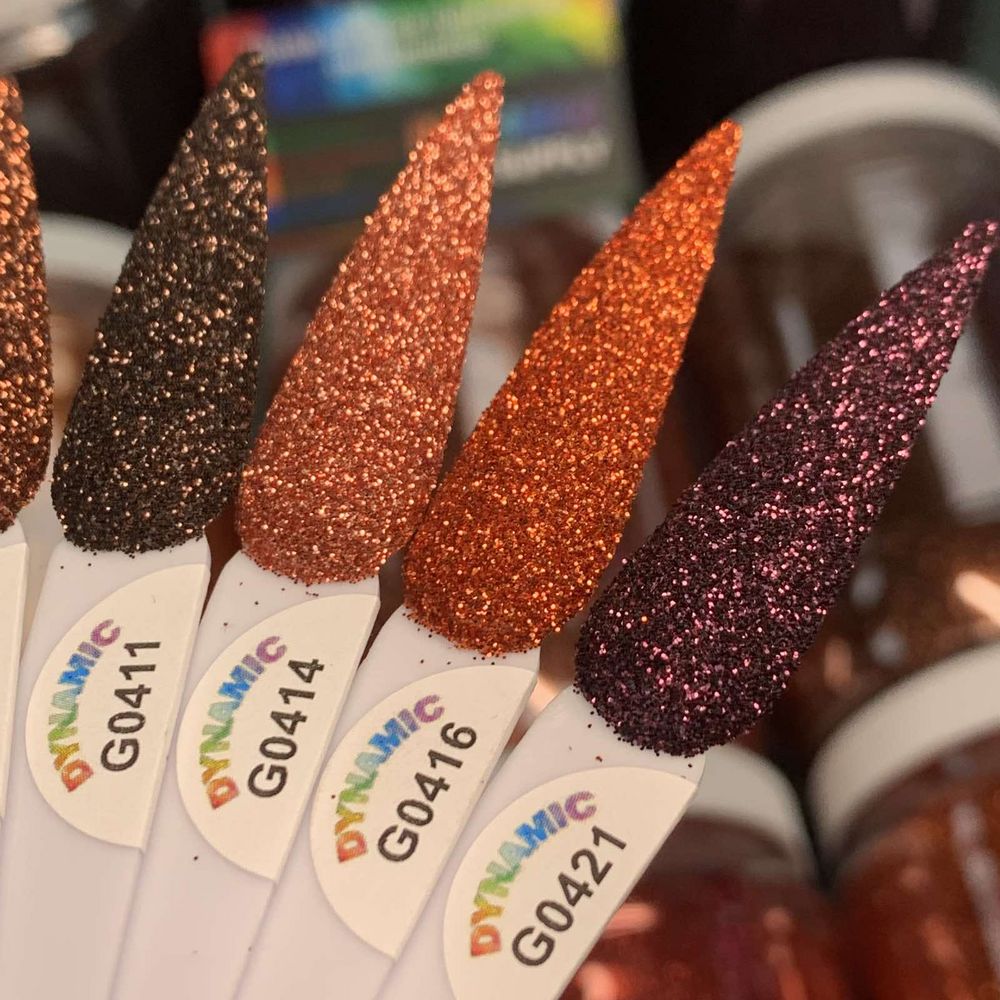
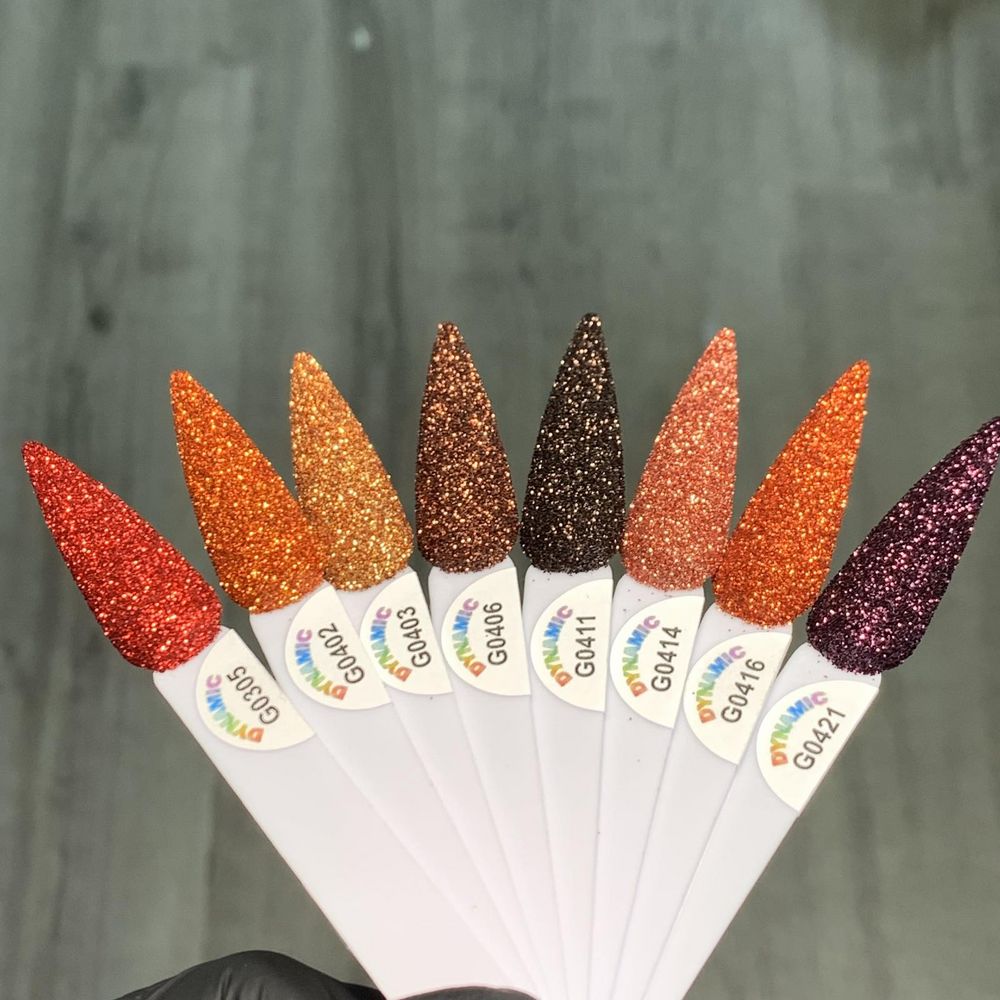
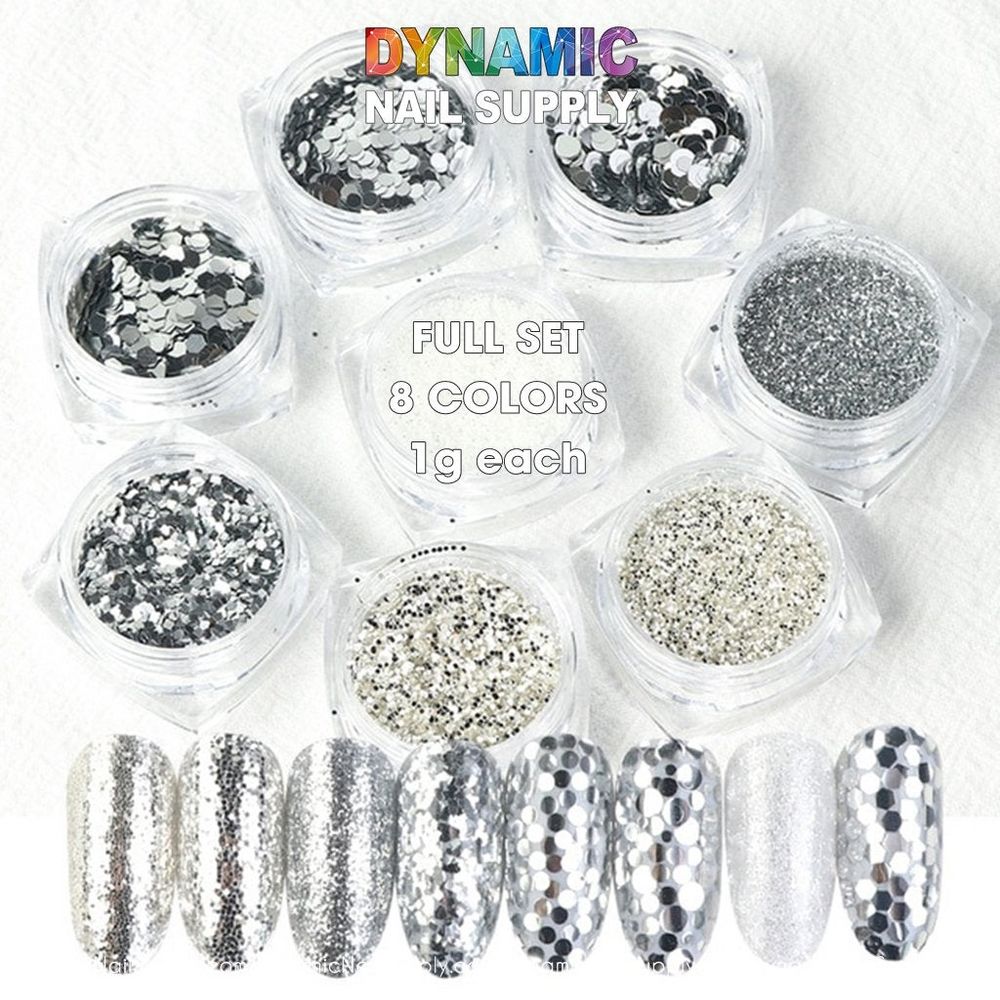
    This season’s nail looks lean into prism shine, micro-rainbows and mirror-like accents that shift with light. Holographic powders deliver that dimensional sparkle without bulky embellishments, making them ideal for both runway-inspired salons and creative at-home manicures.

    For salon pros and at-home artists looking to add that multi-dimensional flash, the holographic glitter set is a quick way to layer holographic shimmer over gels, polishes and acrylics for holiday parties, fall nights out, or everyday glam.

    Why holographic glitter is trending now

    Fashion and beauty cycles currently favor iridescent finishes and metallic accents—textures that read luxe under evening lights and playful in daylight. Holographic powders translate those trends to nails by creating a rainbow sheen that moves with the hand. Because they’re finely milled powders, they can be blended, dusted or encapsulated for subtle to full-coverage effects without adding thickness.

    Simple application methods for seasonal looks

    These are practical ways to use a holographic powder set in current nail services.

    • Dust-over gel polish: After curing a sticky-layer gel, gently rub powder into the surface and finish with a no-wipe or compatible topcoat for a mirror-holo finish.
    • Ombre fade: Use a small brush to blend two complementary holographic shades from cuticle to tip for a modern gradient.
    • Encapsulation: Apply powder on a thin layer of builder gel or clear acrylic, then encapsulate in another clear layer to lock shine and boost durability.
    • Negative-space accents: Keep parts of the natural nail bare and frame them with holographic lines or tips for a minimalist but seasonal look.
    • Mix with clear gel or topcoat: For a softer sheen, suspend a pinch of powder in clear product and apply as a translucent shimmer coat.

    Design ideas to match current seasonal palettes

    Use these motifs to update your nail menu or personal collection:

    • Festival-ready aurora—layer multiple holographic shades for a multi-directional glow.
    • Holiday micro-sparkle—fine holo dust over deep jewel tones for contrast and depth.
    • Minimal chrome edges—thin holo tips on nude bases for sophisticated shine.
    • Winter frost—pair icy blues with silver holographic accents to echo seasonal motifs.
    • Everyday sparkle—subtle holo dust on a sheer pink or beige for office-friendly shimmer.

    Key features in context

    This product is sold as a set of 20 holographic nail art powders, designed for versatile nail applications. A multi-shade kit like this gives technicians and hobbyists the flexibility to mix and match finishes, try layered techniques and create cohesive collections of seasonal looks without sourcing separate pigments.

    Who should use this set

    The set suits a range of users: professional nail technicians updating seasonal services, students experimenting with advanced finishes, or enthusiasts building a home kit for party-ready manicures. Because the powders are a multi-shade collection, they’re especially useful for creatives who want to offer varied holographic effects across a salon menu.

    Care, handling and safety notes

    When working with loose powders, follow basic precautions: keep lids tightly closed when not in use to prevent spills, work over a wipeable surface, and avoid inhalation by applying powders with brushes or applicators rather than blowing them into place. If using near the face, protect eyes and mucous membranes and clean skin with appropriate removers if contact occurs. Store the set away from children and pets.

    Buying tips and quick maintenance for best results

    If you’re adding a holographic powder kit to your offerings, try a few test applications on tips or forms before introducing new techniques on clients. Seal holographic effects with compatible topcoats to maximize longevity and maintain shine between fills. The set is competitively priced at $8.00, though prices may change—available from Dynamic Nail Supply for easy restocking.

    Conclusion

    Holographic powders are a seasonal must-have for creating eye-catching, modern manicures. A 20-piece set provides the range and convenience needed to experiment with gradients, encapsulations and accents that capture current trends. Whether you’re refreshing a salon menu or crafting your next at-home statement look, these powders make it simple to bring prism shimmer to every nail service.
  • No-Lift Nail Primer: Beginner’s Guide to Extra Strength Prep

    No-Lift Nail Primer: Beginner’s Guide to Extra Strength Prep

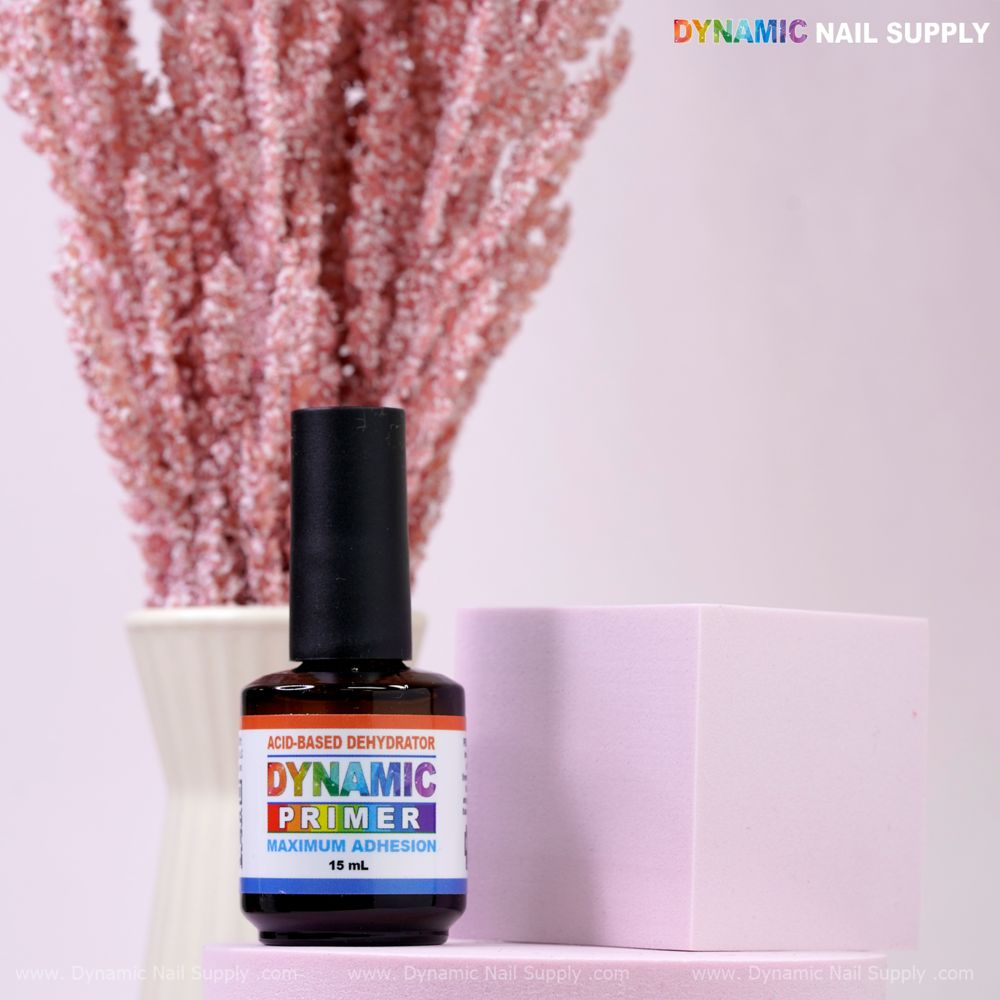
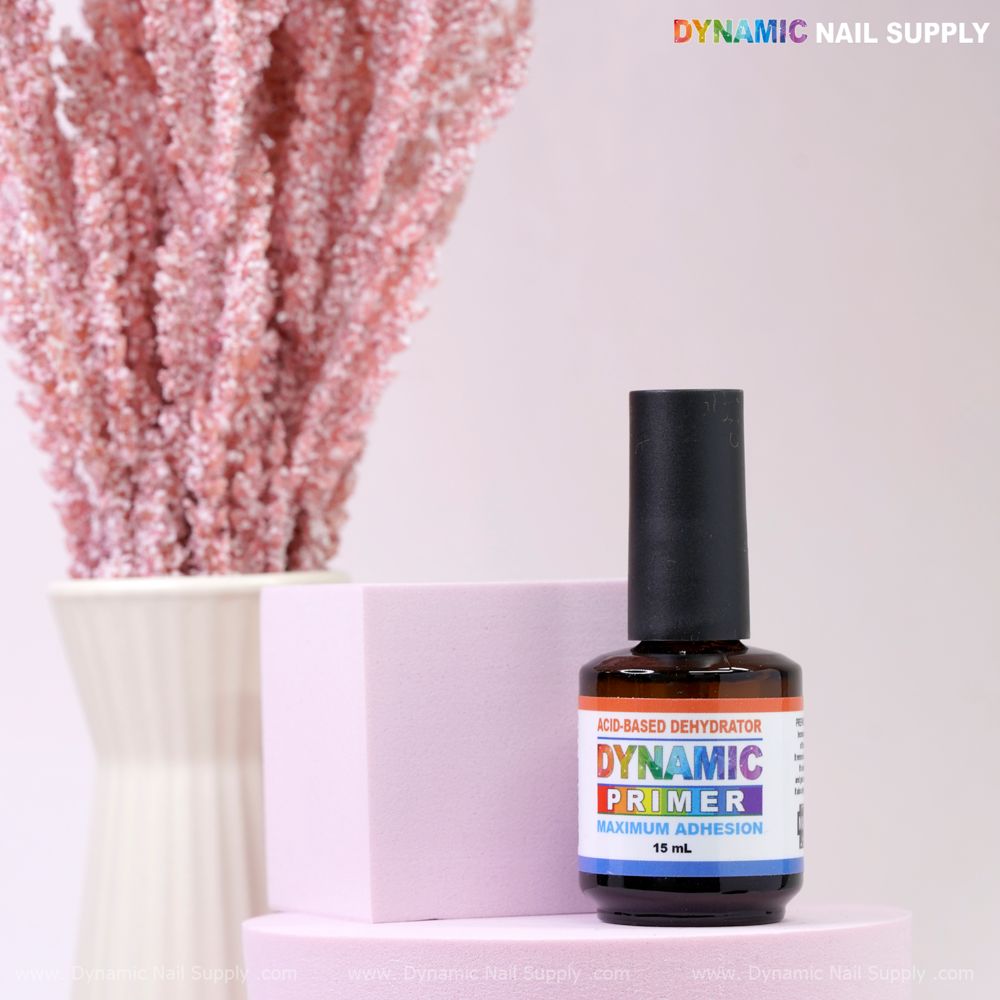
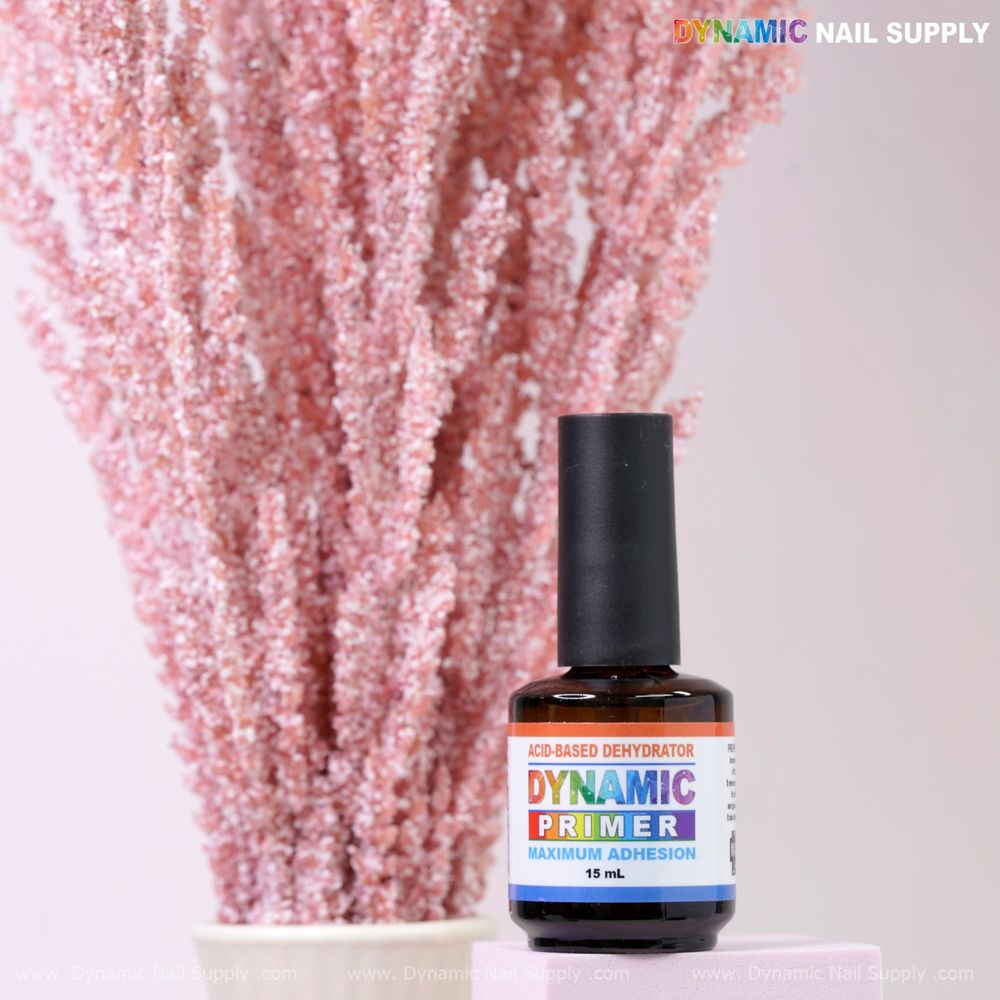
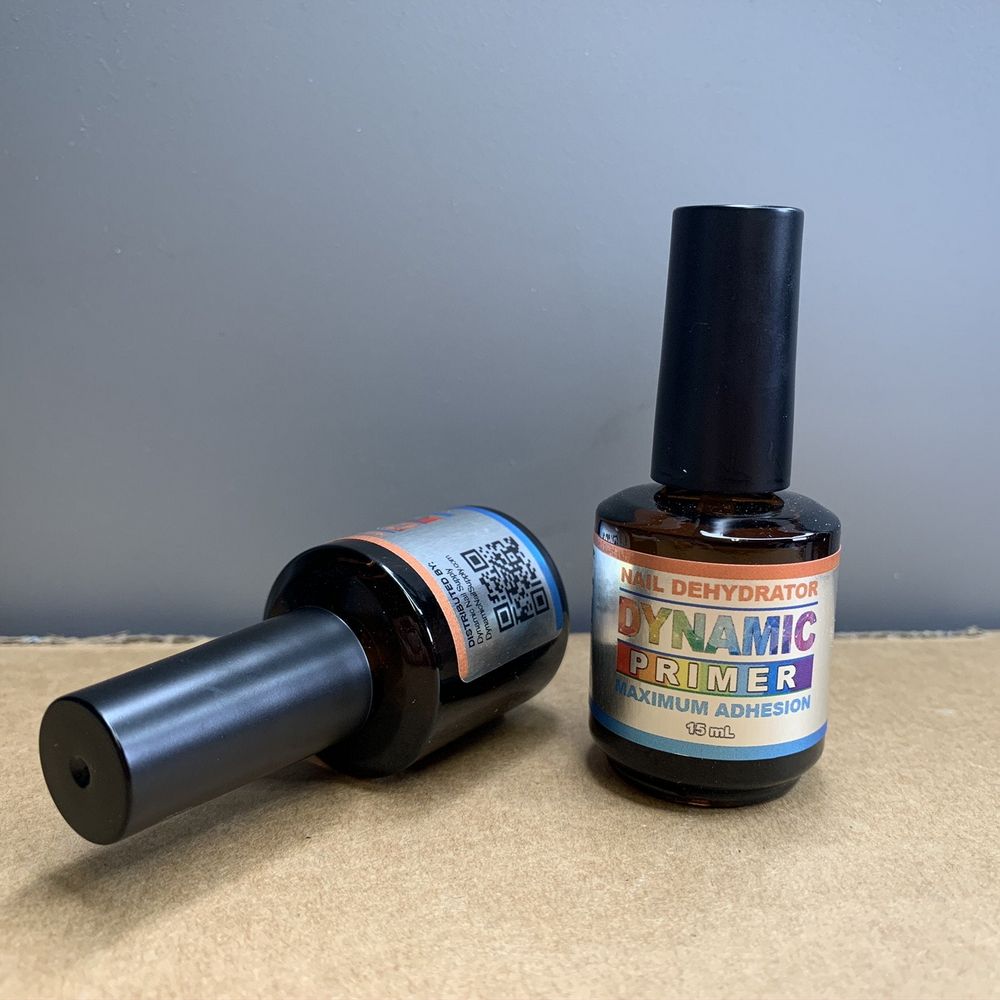
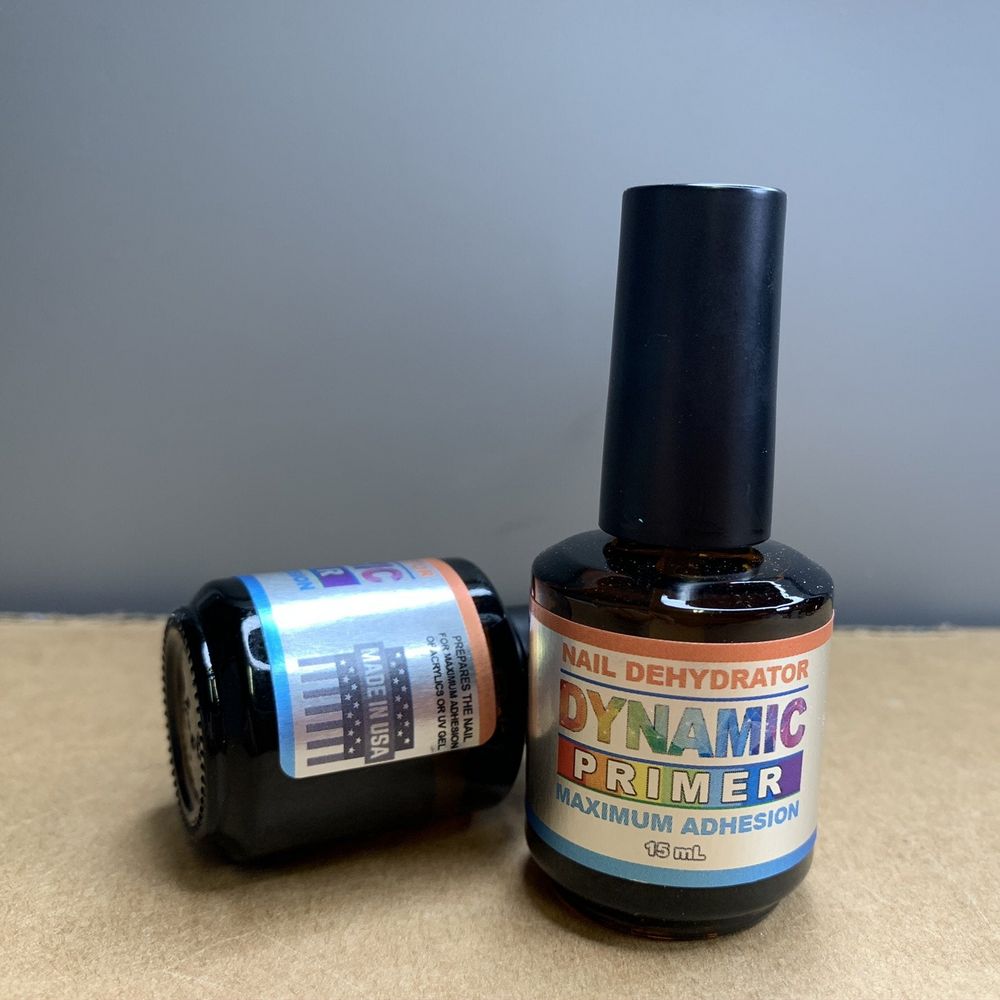
    Starting with a reliable primer can be the difference between a set that lifts in a week and one that stays secure for the life of the service. This beginner-friendly explainer breaks down what a no-lift nail primer does, why an extra strength formula matters, and exactly how to use it in a simple, safe routine.
    If you want the exact product referenced in this walkthrough, see no-lift nail primer guide for the bottle and sizing options.

    What “no-lift” and “extra strength” mean

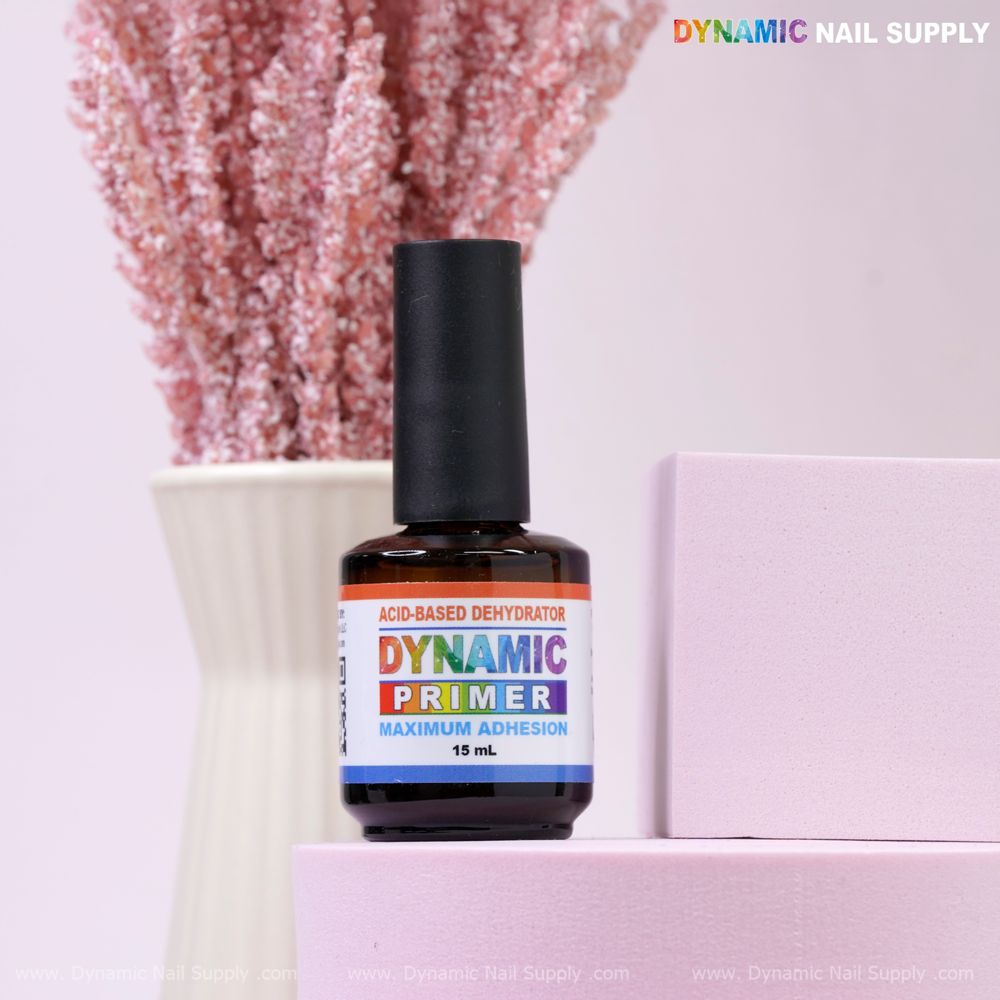
    “No-lift” describes a primer formulated to reduce or prevent lifting of acrylic and gel enhancements from the natural nail. An extra strength version increases bonding performance, which is useful for clients with oily nail beds or a history of frequent lifting. These primers usually contain potent bonding agents that penetrate the nail plate to create a firmer anchor for enhancements.

    15ml no-lift primer bottle - 2

    Key product features to know

    • Bonding performance: Designed to improve adhesion and reduce separation between enhancement and natural nail.
    • Fast-setting: Dries quickly to speed service times while still leaving a workable surface for product application.
    • Controlled brush application: The bottle and brush are made for precise placement to avoid over-application near the cuticle.
    • Compatibility: Intended for use with acrylics, gels, and acrygel systems.
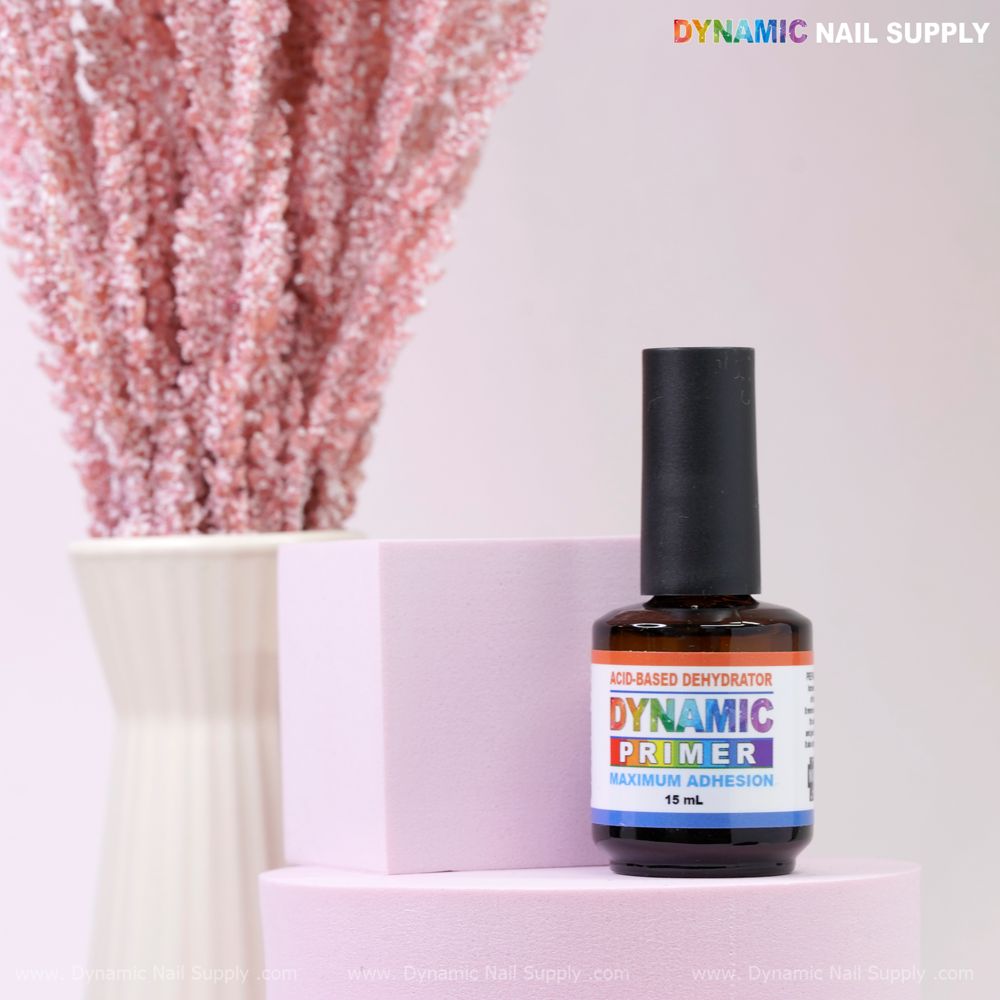
    • Size options: Sold in a 15 ml (0.5 oz) bottle, with larger professional refill sizes available on request.
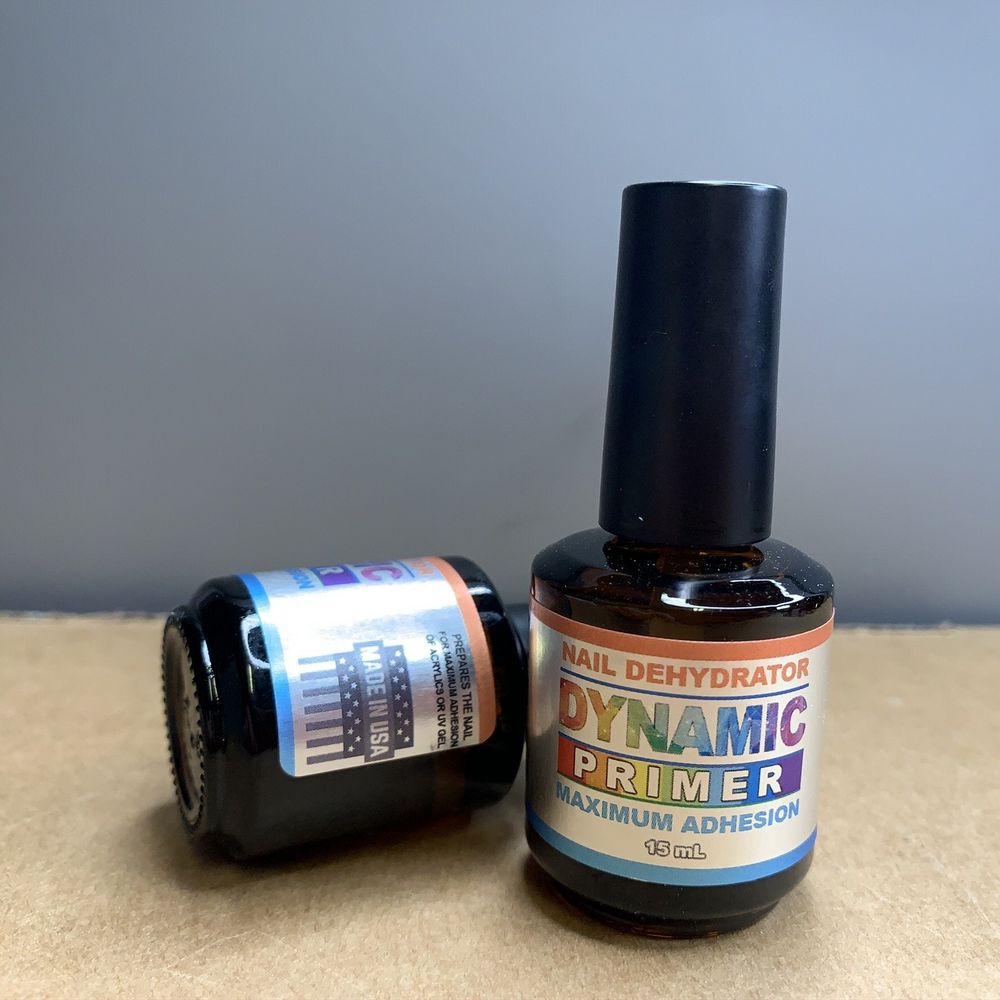
    • Ingredients and origin: Contains Methacrylic Acid, MEHG, Iso Butyl Methacrylate, and Tocopheryl Acetate; made in the USA.
    15ml no-lift primer bottle - 3

    Step-by-step: How to use a no-lift nail primer (beginner)

    1. Prep the natural nail. Remove old product, push back and trim cuticle if necessary, and lightly etch or buff the nail plate to remove shine and surface oils. Clean the nail thoroughly so no dust or oils remain.
    2. Apply sparingly. Use the brush to paint 1–2 thin coats on the nail plate. Aim for a thin, even film—overuse increases the risk of product pooling and skin contact.
    3. Leave the final coat slightly tacky. Don’t let the very last layer fully harden; leave it slightly wet before placing acrylic powder or gel. This helps chemical bonding between systems.
    4. Dry briefly. Allow air-dry for around ten seconds in normal room temperature to set the primer before starting enhancements.
    5. Proceed with enhancement application. Follow your usual acrylic, gel, or acrygel workflow immediately after priming. For additional insurance, some technicians pair a bonding agent as a next step.
    15ml no-lift primer bottle - 4

    Practical tips to avoid common beginner mistakes

    • Keep primer off the skin: Contact with cuticle or surrounding tissue can irritate. Apply with a steady hand and use minimal product.
    • Thin layers only: More is not better. Thin coats dry faster and create a better surface for adhesion.
    • Work quickly but deliberately: Fast-drying formulas save time, but you must still position your enhancement materials without delay.
    • Ventilation matters: Use in a well-ventilated area to reduce inhalation of fumes.
    • Patch test if unsure: If inflammation or sensitivity is present, avoid use until cleared by a professional; do not apply to inflamed tissue.
    15ml no-lift primer bottle - 5

    Who should use an extra strength no-lift primer?

    This type of primer is aimed at licensed nail professionals working with clients who struggle with lifting—especially those with naturally oily nail beds or repeat lifting problems. It’s sold as a professional product and labeled for professional use only. For salons needing larger quantities, contact the supplier for refill sizes and bulk ordering.

    15ml no-lift primer bottle - 6

    Care, storage and safety reminders

    • Store in a cool, shaded place away from direct heat or sunlight.
    • Avoid contact with skin and eyes; if irritation occurs, stop use and rinse thoroughly with water.
    • Do not use on inflamed or damaged nails or tissue.
    • Use only in well-ventilated spaces and follow local safety guidelines for handling acid-based primers.
    • This cosmetic product is a final sale; returns or exchanges are not accepted.
    15ml no-lift primer bottle - 7

    Short conclusion and buying note

    For beginners, choosing an extra strength no-lift nail primer simplifies adhesion challenges and provides a straightforward prep step that improves longevity for acrylic and gel sets. Typical retail price is $5.00, though prices may change; ensure you follow professional-use guidance and safety precautions every time.

  • Neon Gel Polish Collection — Which Shades Suit You?

    Neon Gel Polish Collection — Which Shades Suit You?

    Not every nail artist or client needs the brightest possible polish, but when you want nails that arrest attention, neon is the fastest route. This comparison-style guide looks at the Dynamic Neon Gel Polish collection and helps you decide who should choose these high-voltage shades and who might be better served by a different gel finish.

    What the collection brings to the table

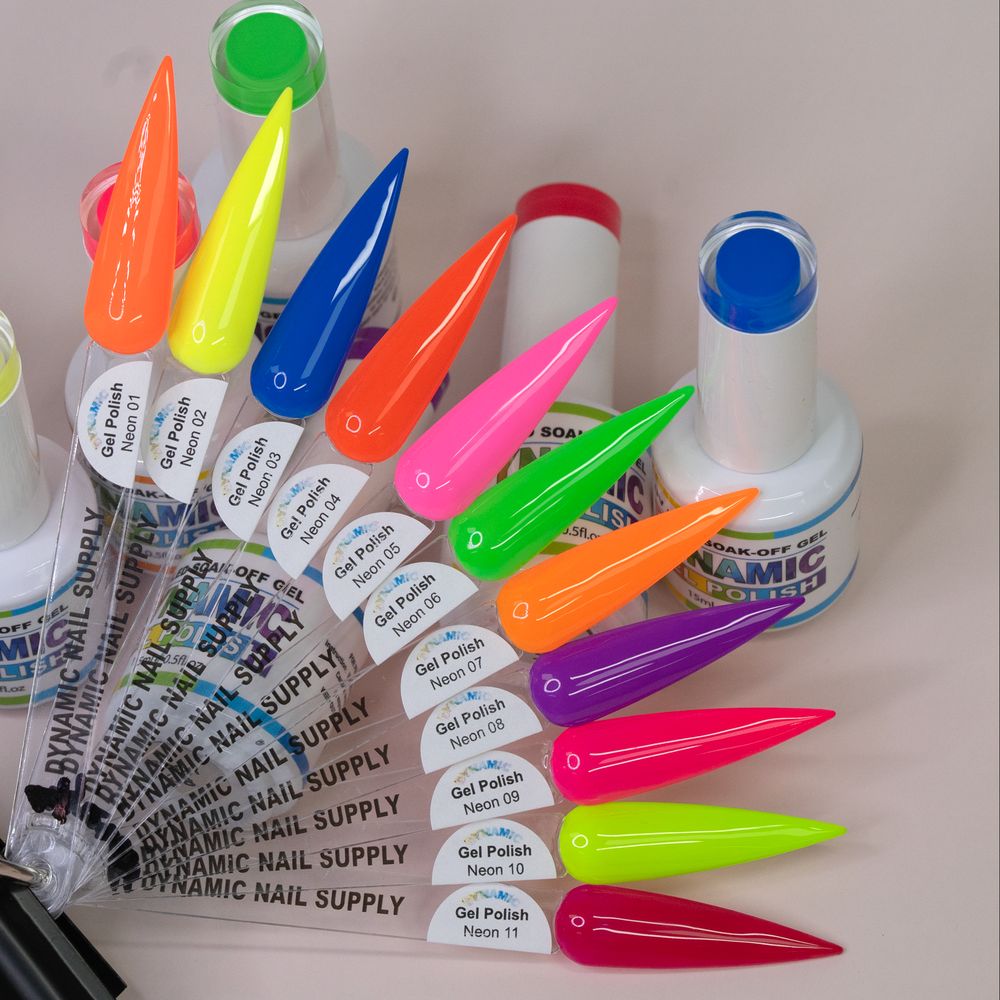
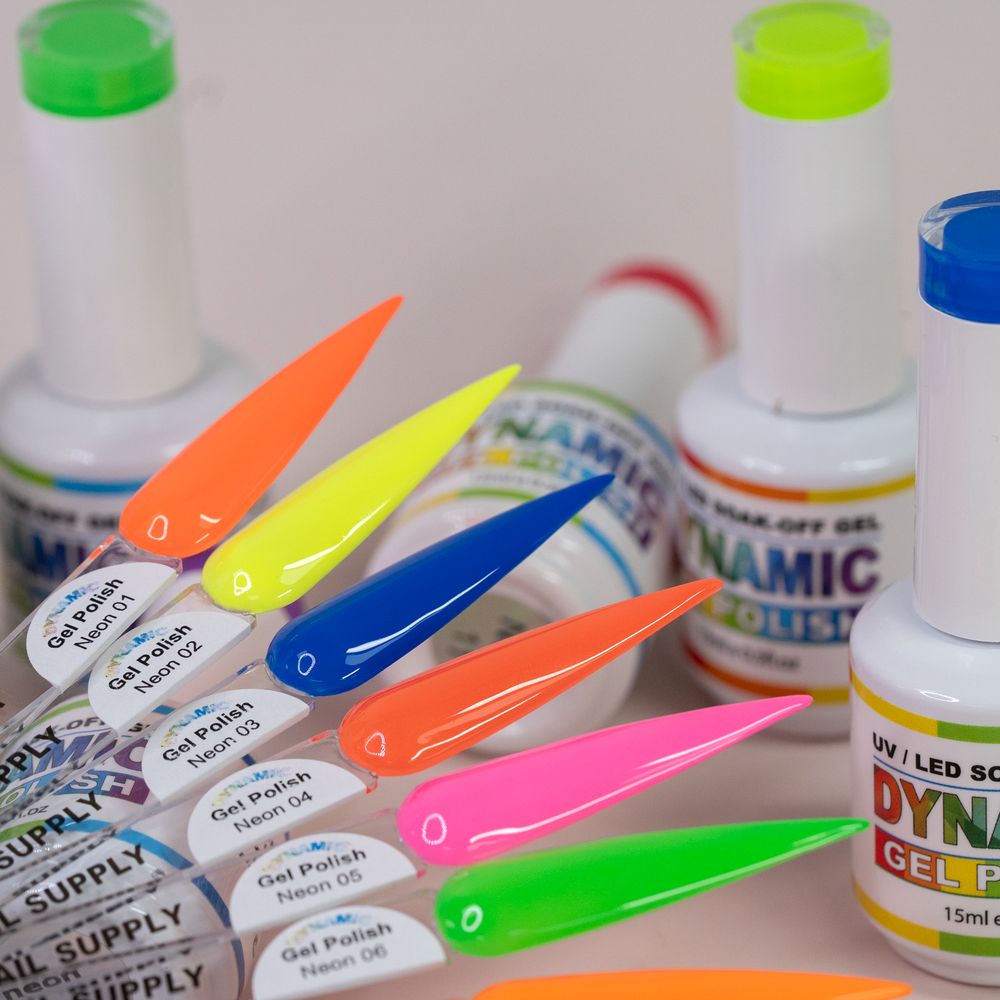
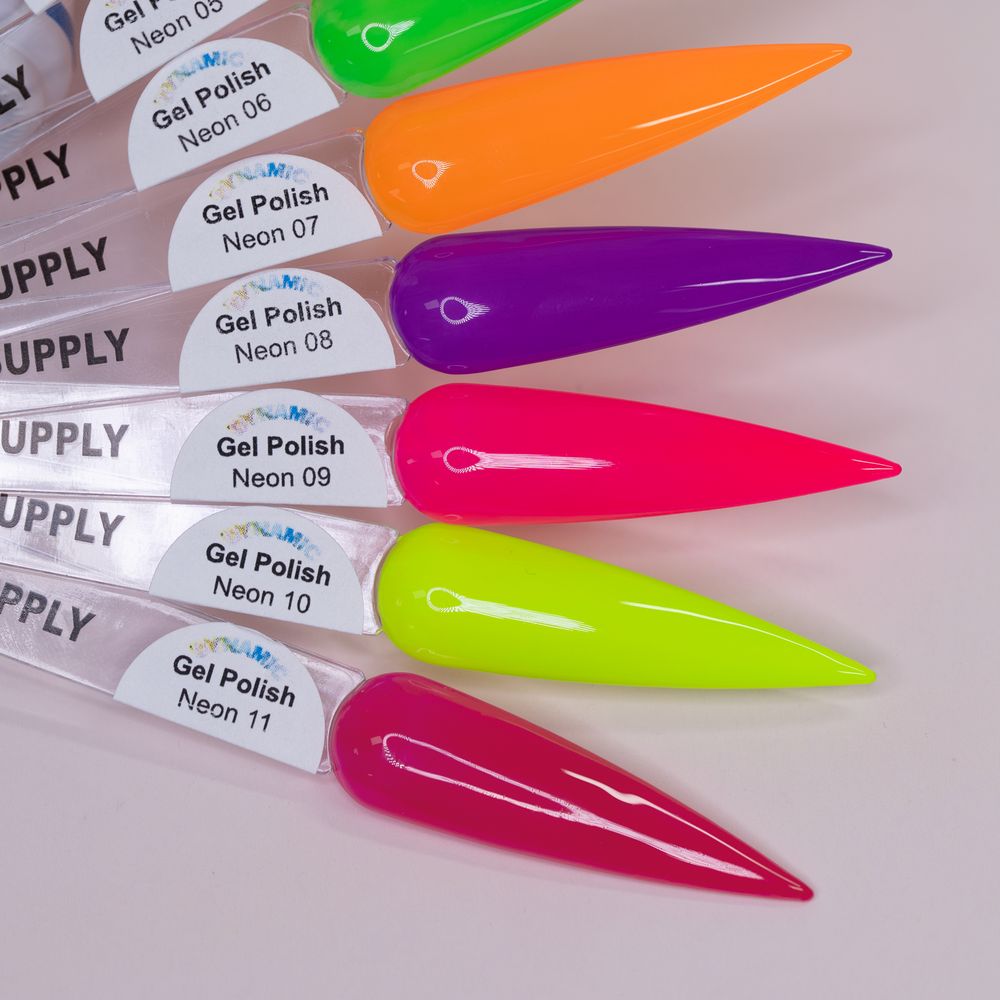
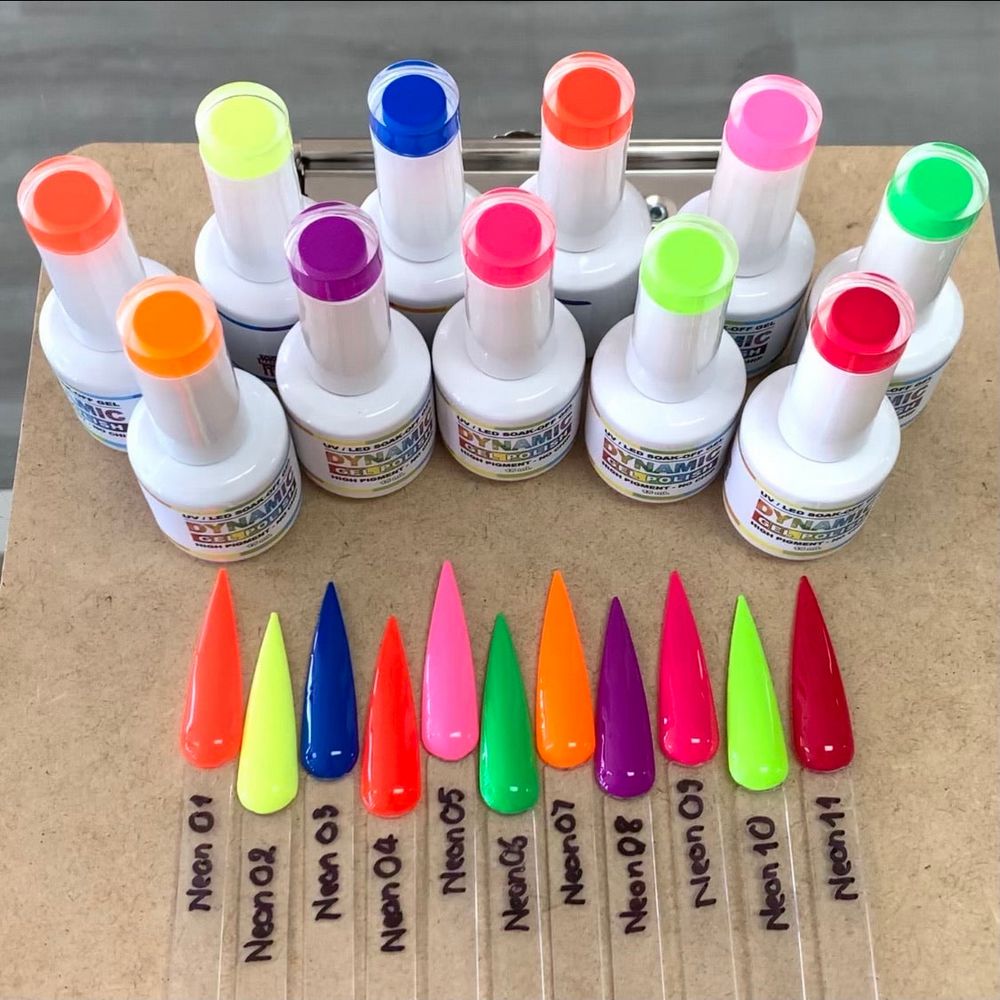
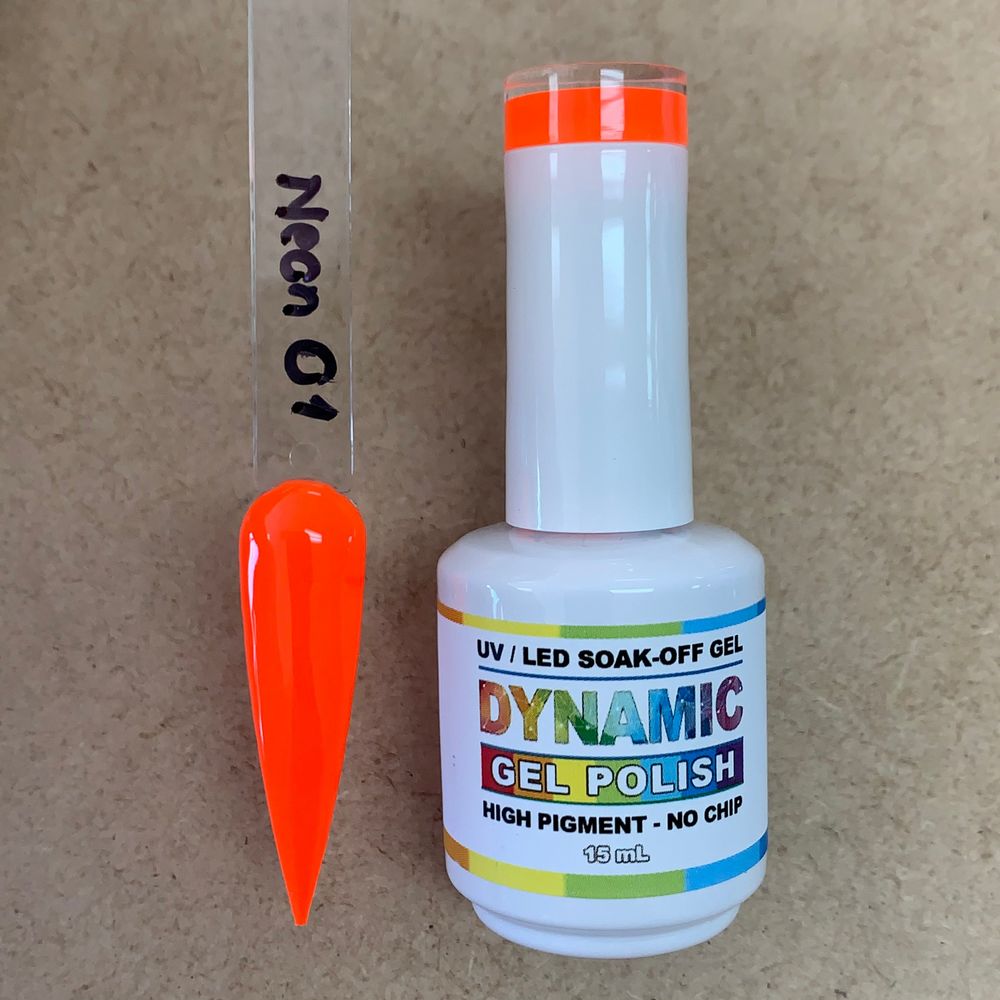
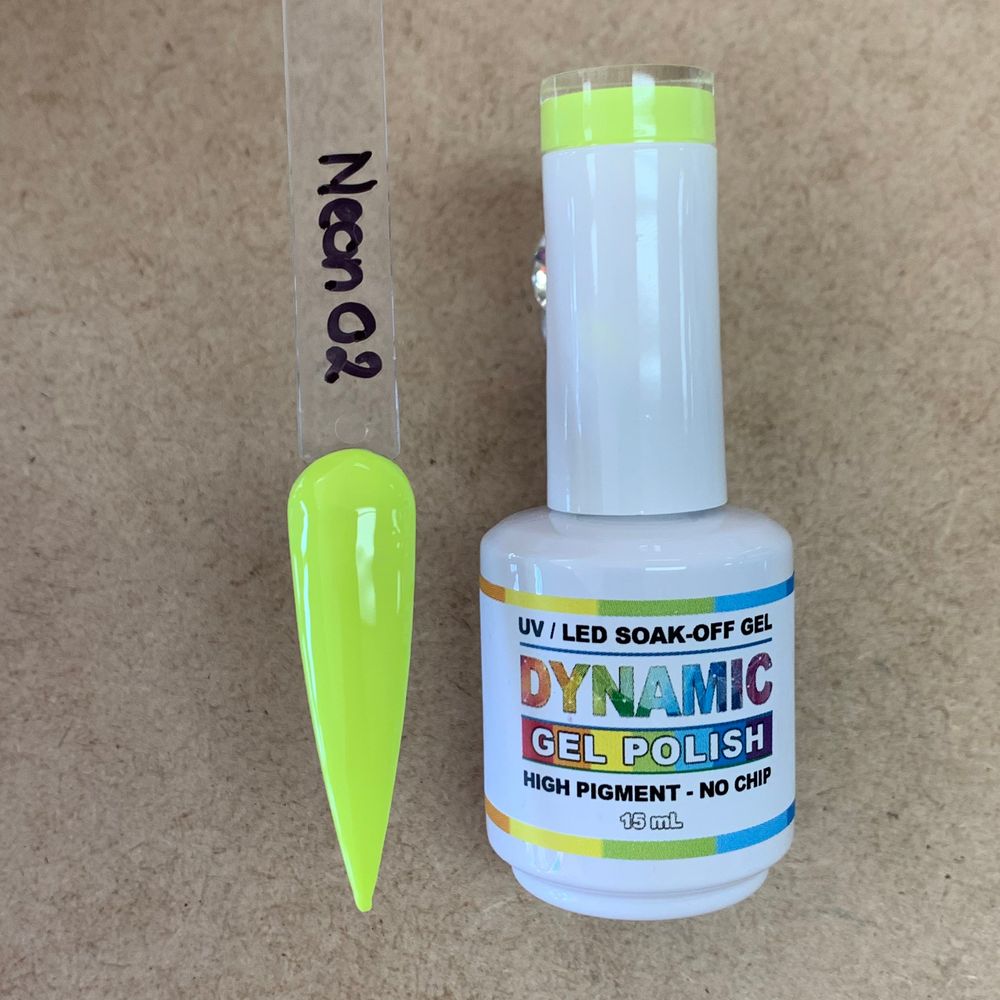
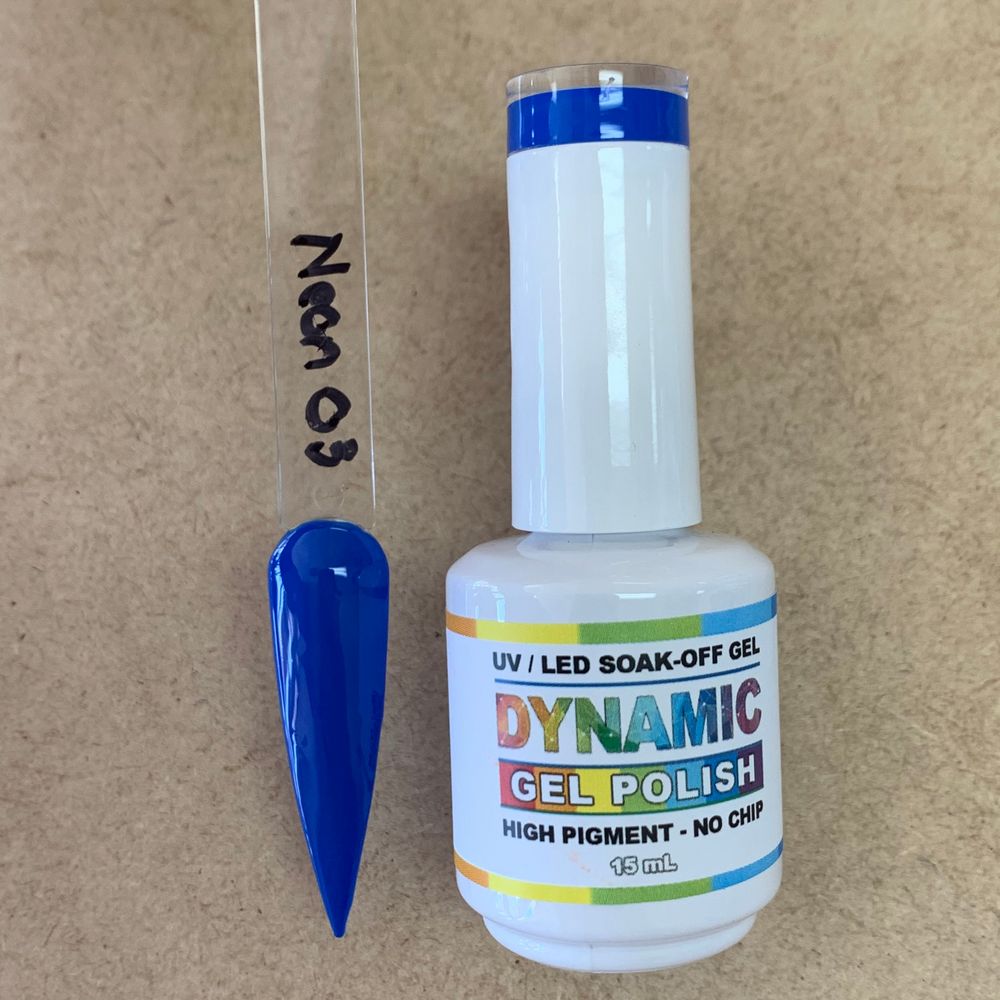
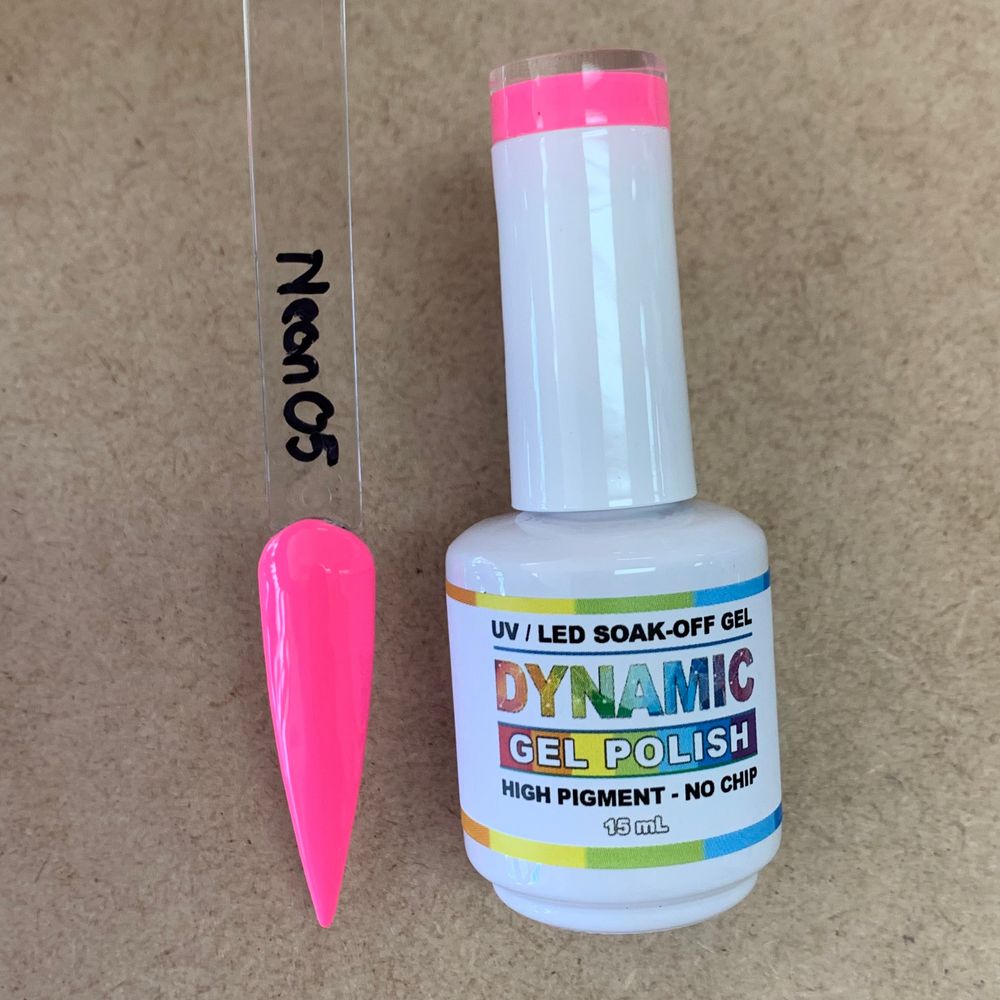
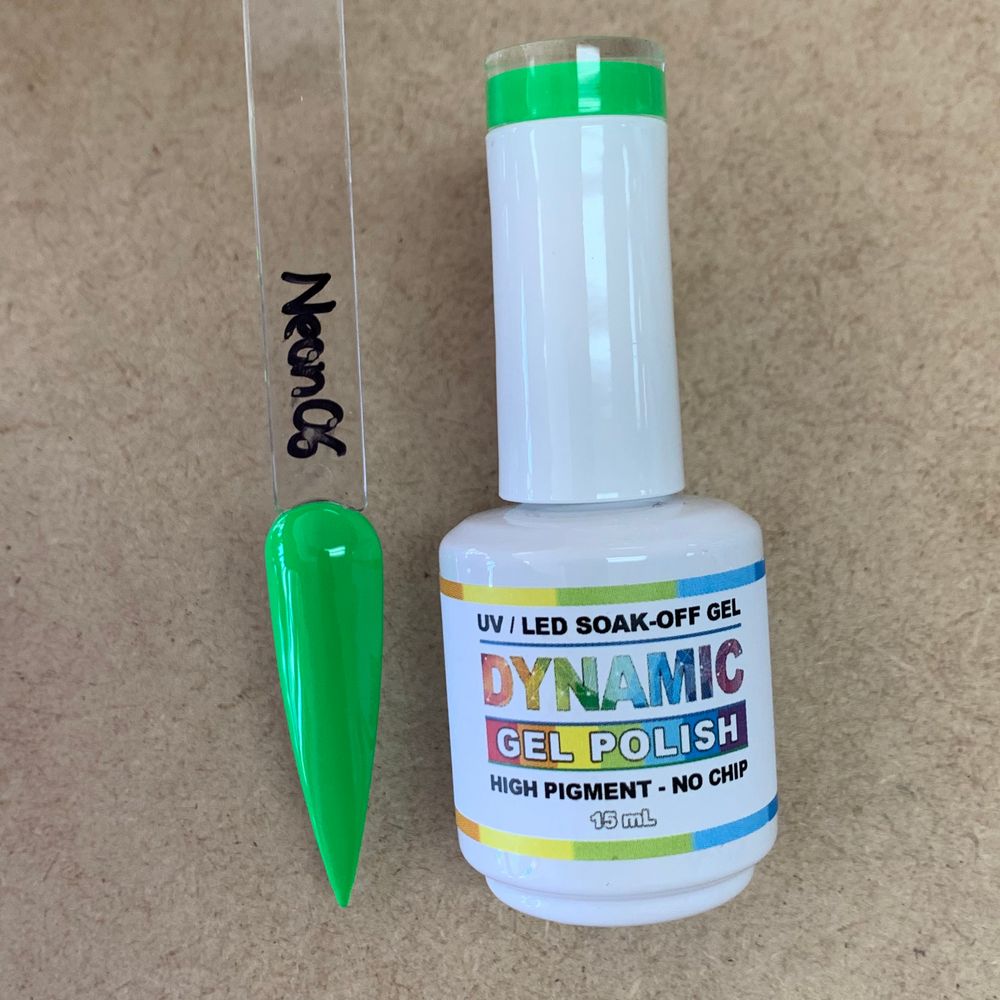
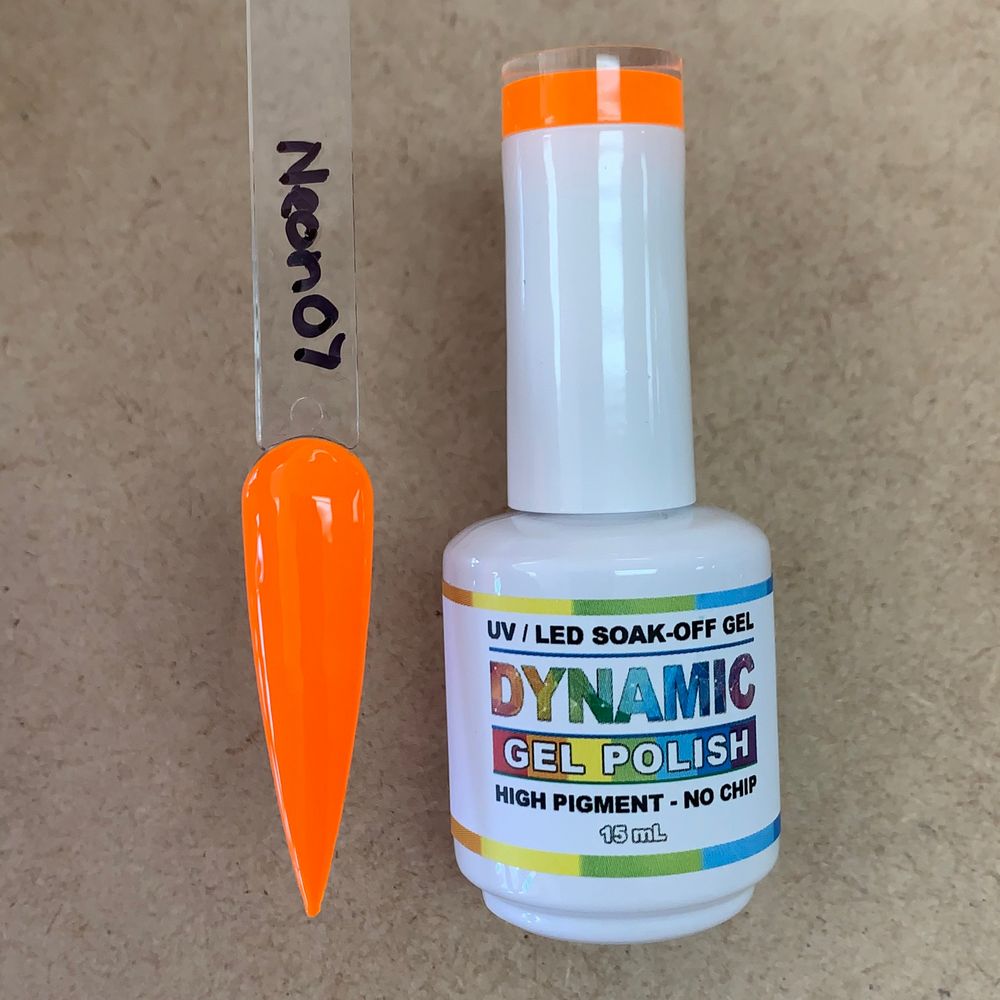
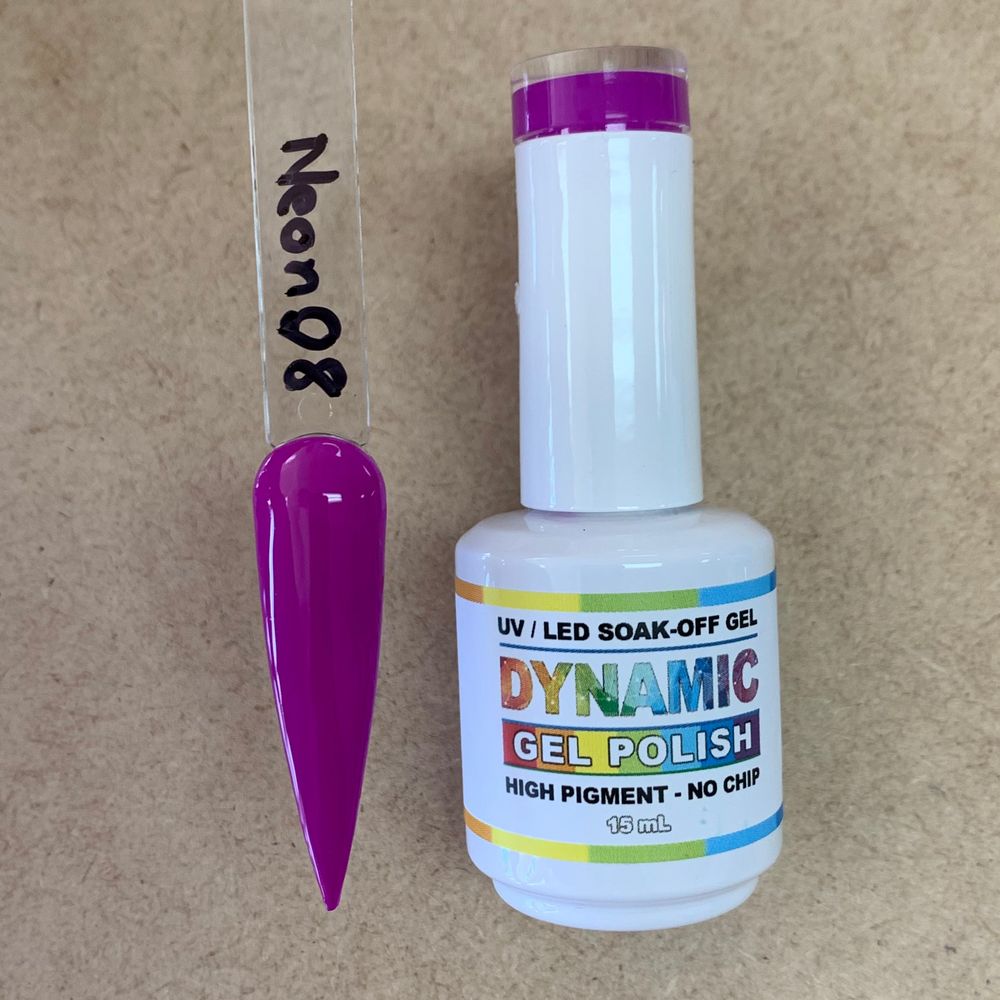
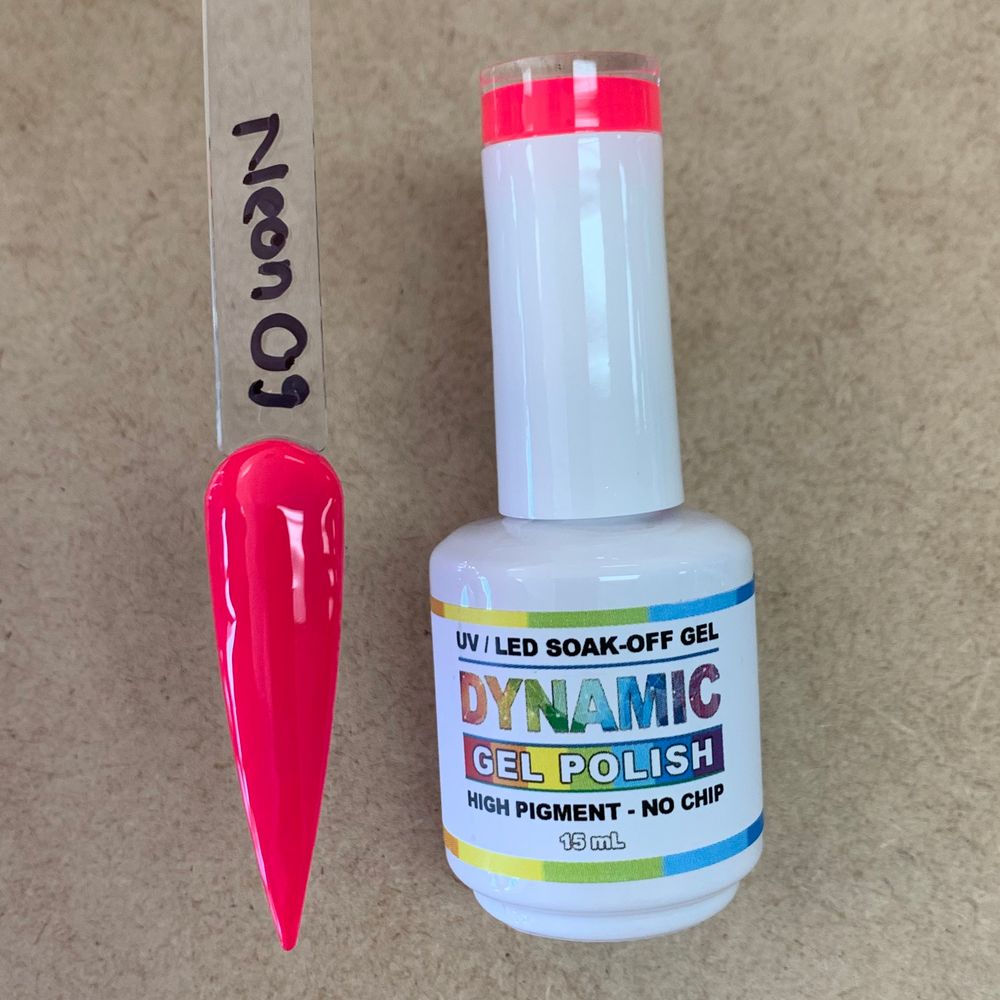
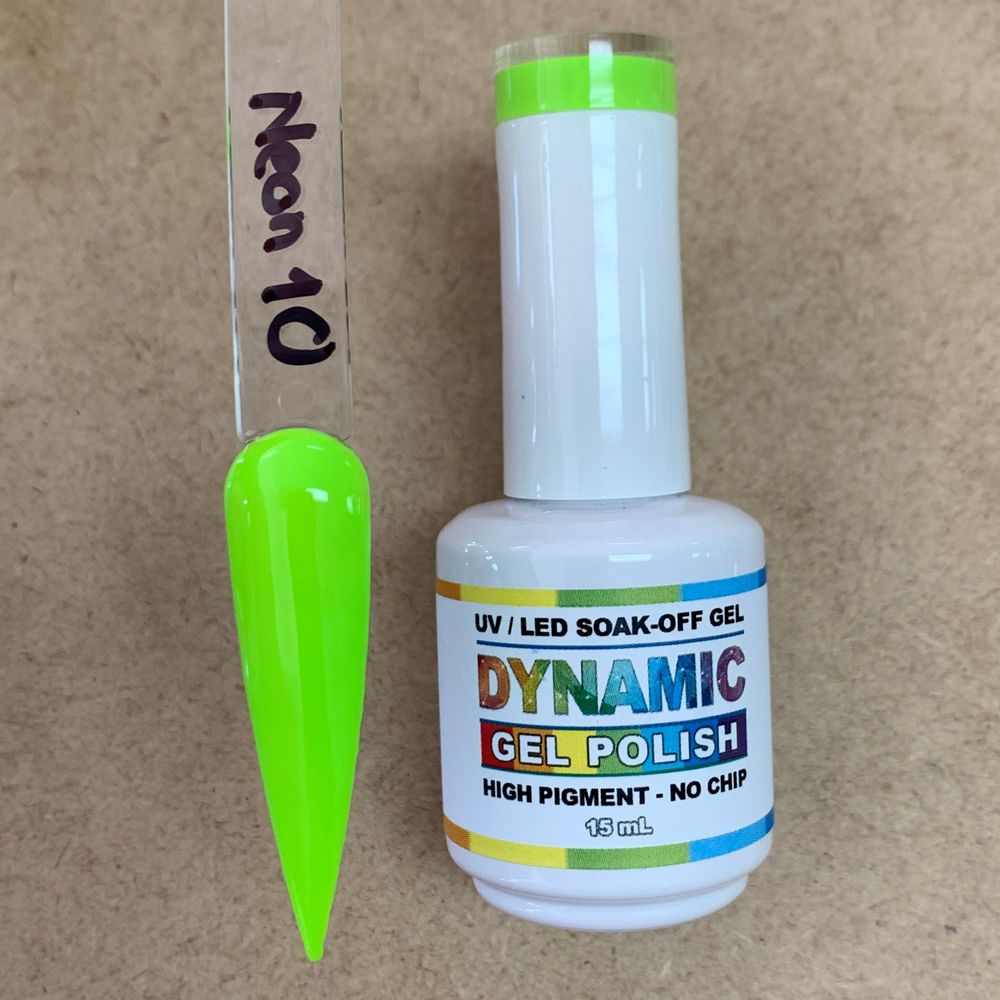
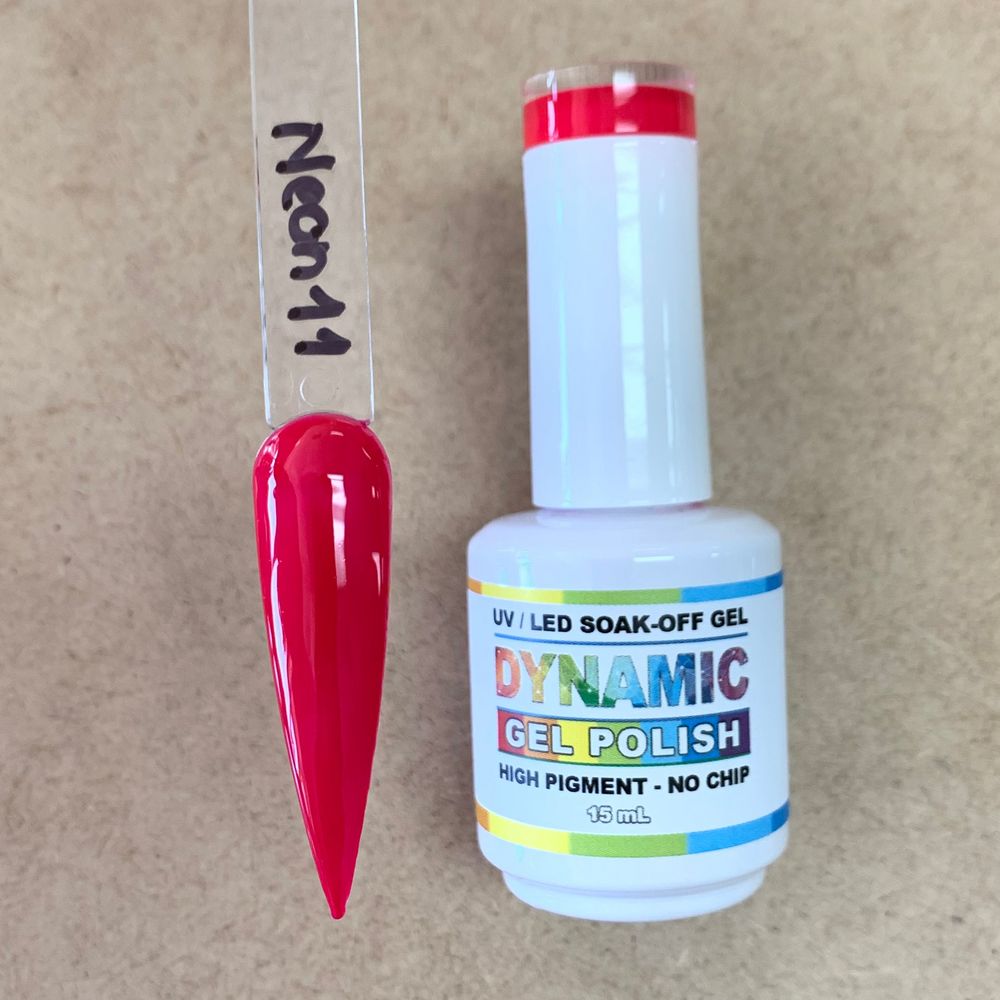
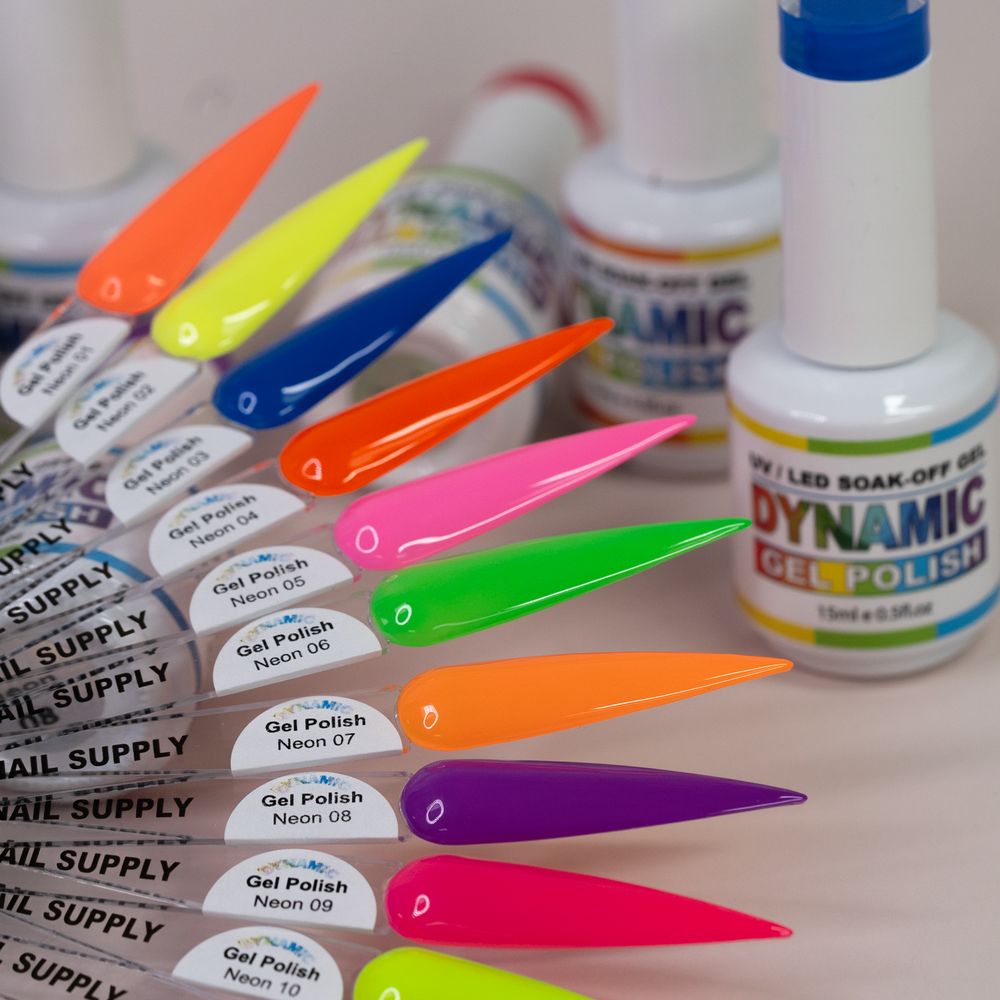
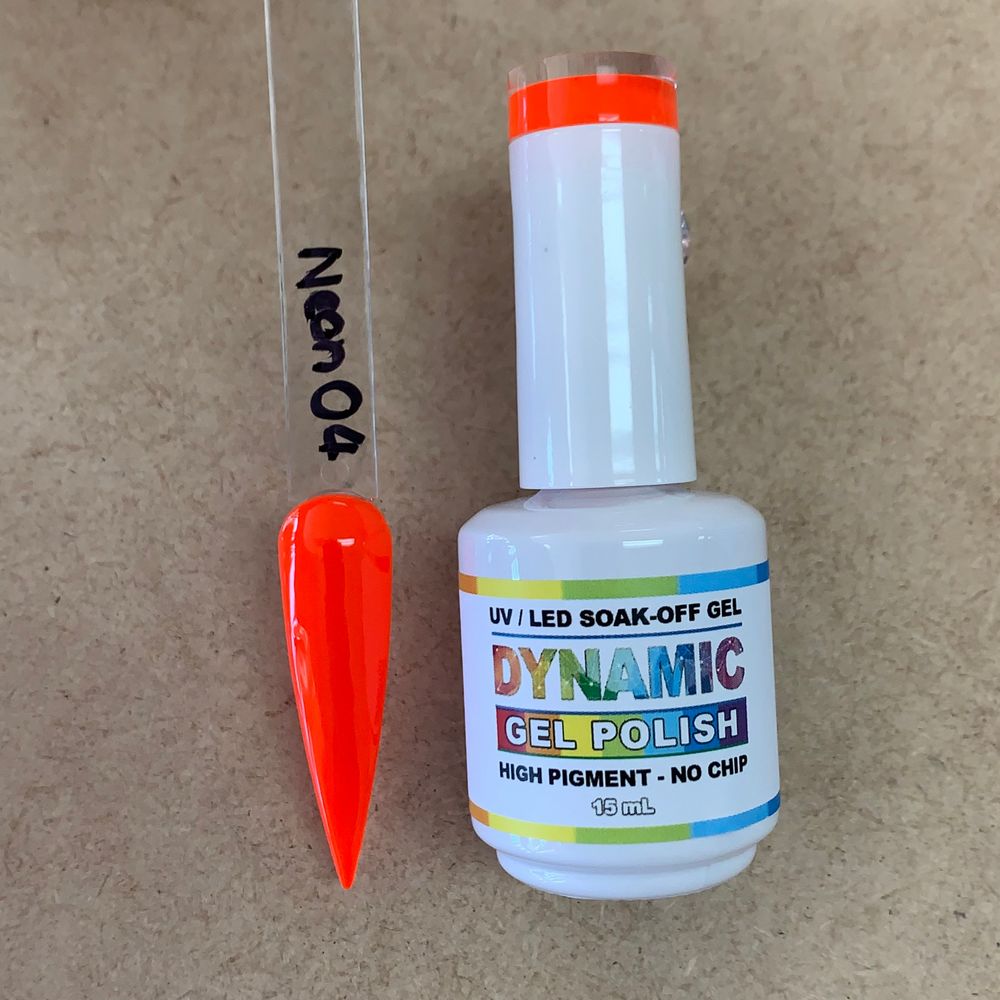
    The Dynamic Neon Gel selection includes eleven single shades plus an option to buy the full 11-color set. Bottles are 15ml (0.50oz) each. These gels are formulated to deliver vivid, fluorescent color that stands out in regular light and intensifies under UV/blacklight. The line is described as long-wearing — up to four weeks of chip-resistant wear — and designed for smooth, pigmented coverage so fewer coats are needed. When it’s time to remove, the colors soak off with acetone or gel remover.

    Neon gel polish bottles - 2

    Key features in context

    • High-impact neon shades: A rainbow range built for bold manicures and festival looks.
    • Blacklight-reactive performance: Colors glow under UV, making them ideal for nightlife and events.
    • Durability: Up to four weeks of chip resistance when applied correctly.
    • Coverage and application: Highly pigmented for fuller coverage in fewer coats, which can speed salon service times.
    • Soak-off removal: Takes off with acetone or gel remover like most soak-off gel systems.
    • Recommended system: Dynamic suggests a three-step approach — self-leveling base coat gel, then your neon color, finished with either a Diamond No-Wipe or a Velvet Matte No-Wipe top coat depending on the desired shine.
    Neon gel polish bottles - 3

    Who should choose this neon gel polish collection?

    Pick this collection if you or your clients want visible, high-energy color that reads from across the room. The palette suits:

    • Festival-goers and party clients who want a glow-under-UV effect.
    • Nail techs offering seasonal or themed services (summer, raves, club nights).
    • Designers who layer neons for ombrés, color blocks, or bold nail art that requires strong base pigments.
    • Salons that value quick coverage: high pigmentation can reduce the number of layers and cure cycles.
    Neon gel polish bottles - 4

    Who might prefer a different option?

    Neon is not the best fit for every brief. Consider alternatives when:

    • Clients want subtlety: If a softer, understated look is required — think natural tones, sheer nudes, or muted pastels — a standard cream or sheer gel may be better.
    • Strict dress codes apply: Corporate environments or conservative settings often call for low-key finishes rather than fluorescent color.
    • Complex layering without overpowering pigment: For delicate translucent effects, a less opaque polish offers more control.
    • Needing specialized finishes: If matte-from-the-bottle, chrome, or builder gels are required for structure, pick a product designed for that purpose.
    Neon gel polish bottles - 5

    Practical application tips for best results

    To maximize the performance of neon gel polish, follow a consistent protocol. Start with clean, dehydrated nail plates and a self-leveling base coat to even the surface. Apply thin, even coats of neon; because these shades are highly pigmented, one to two coats often suffice. Cure each layer fully under a compatible LED/UV lamp. Finish with one of the recommended no-wipe top coats—choose Diamond No-Wipe for glossy shine or Velvet Matte No-Wipe for a matte finish.
    To explore the full set and view shade options, check the selection Gel Polish Neon Colors for swatches and purchase choices.

    Neon gel polish bottles - 6

    Care and removal notes

    Neon gel wears similarly to other soak-off gels: keep nails dry after application for a few hours and avoid harsh chemicals to prolong wear. When removing, soak with acetone or a gel remover and use gentle tools to avoid damaging the natural nail. Because of the strong pigments, ensure removal is complete to prevent staining of the nail plate.

    Neon gel polish bottles - 7

    Pricing and kit options

    Individual shades are listed at $6 each and the full 11-color set is offered as a packaged option at $66; prices may change. Buying the set is often the most economical route for techs who plan to use multiple neon tones in their services.

    Neon gel polish bottles - 8

    Quick comparison checklist

    • Choose neons if: you prioritize bold color, photo- or event-ready looks, and UV-reactive effects.
    • Choose alternatives if: you need discreet color, sheer layering, or specialty structural gels.

    Dynamic Nail Supply lists these shades as a new arrival in their summer lineup, and the collection is distinctly aimed at anyone seeking bright, playful nails. If high-impact color and blacklight glow are priorities for your next service, this neon gel polish collection is a strong, practical choice. For quieter looks or specialty structural needs, consider pairing a few neon shades with more muted polishes or choosing a different product line tailored to those finishes.
    Conclusion: pick the Dynamic Neon Gel Polish collection when your brief calls for bold, long-lasting color with party-ready glow; opt for a gentler cream or builder gel when subtlety, structure, or sheer layering is the priority.

  • Metallic Glitter Acrylic Powder: Which Option to Choose

    Metallic Glitter Acrylic Powder: Which Option to Choose

    Choosing glitter for professional nails means balancing creativity, speed and inventory cost. The Sparkle Metallic Glitter Shimmer Collection Part 1 offers both raw glitter jars and pre-mixed glitter-acrylic blends — two workflows that deliver similar sparkle but very different studio experiences. This guide helps you decide which option fits your clients, schedule and technique.
    What’s in the collection: colors, sizes and formats

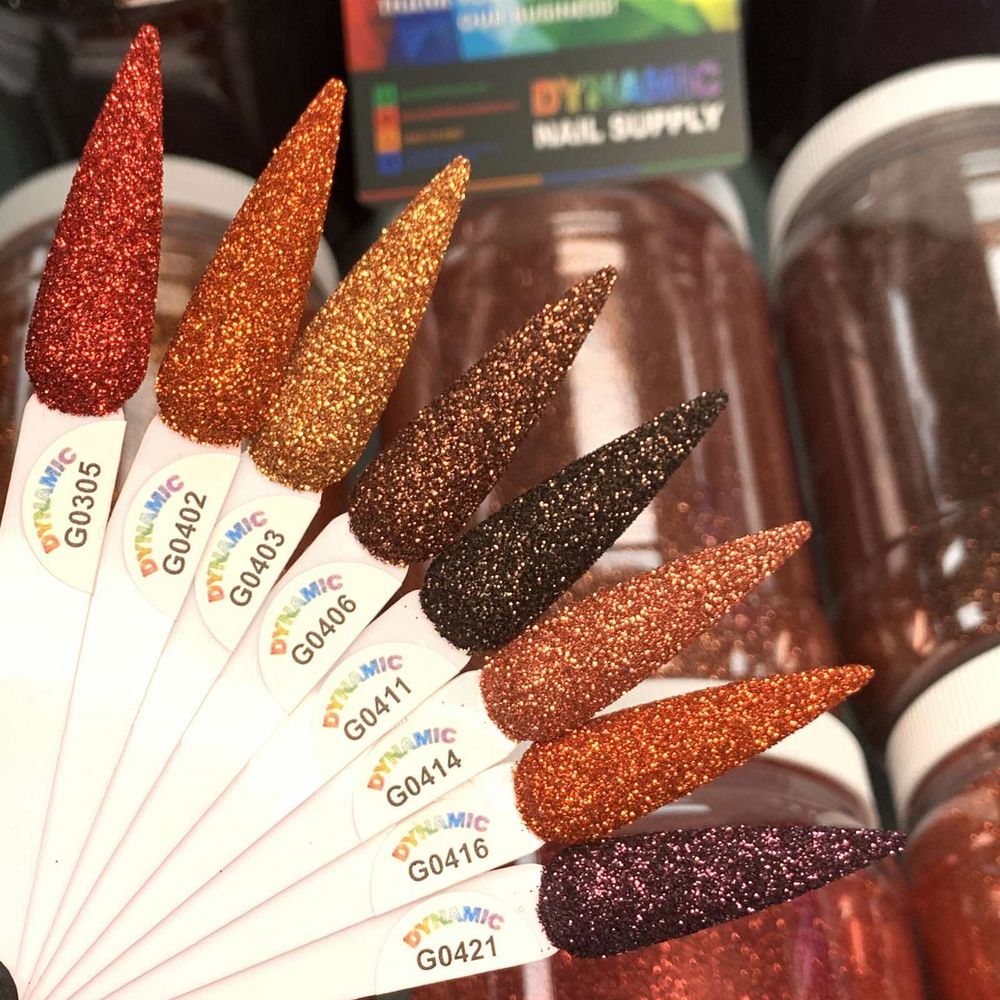
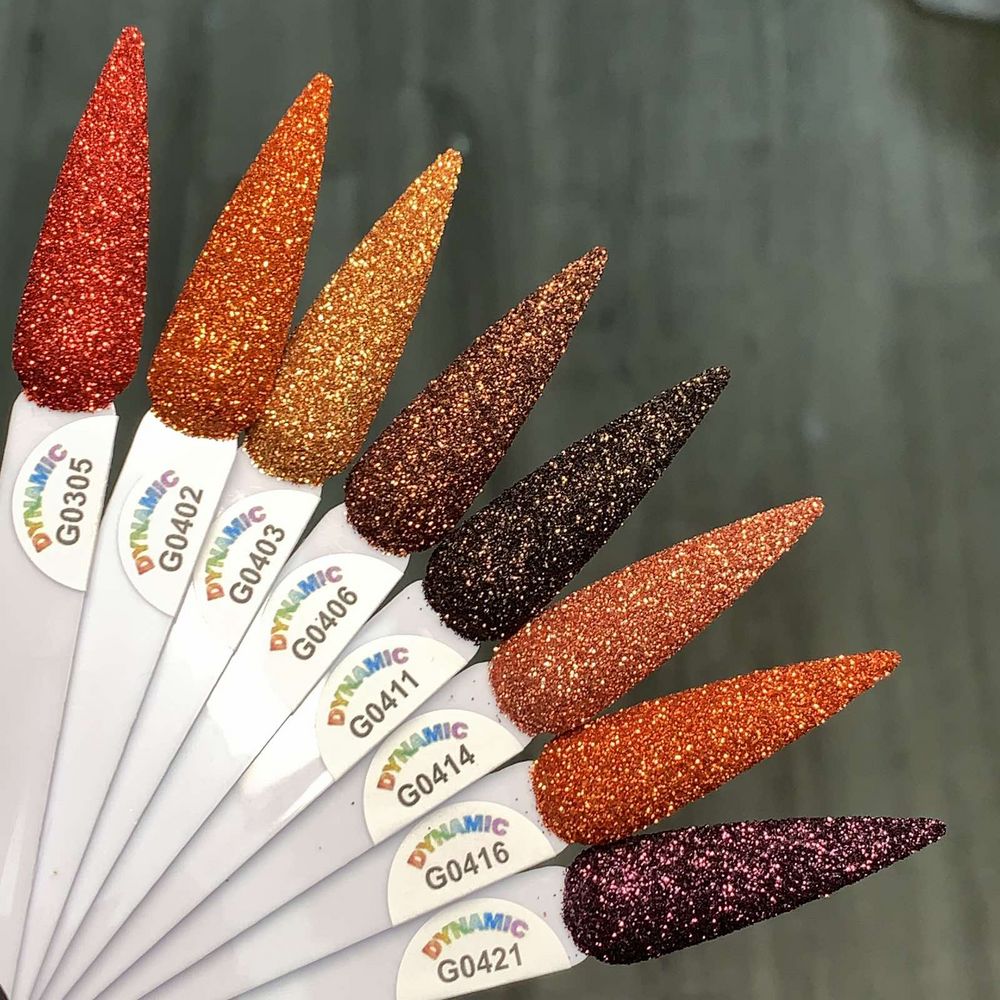
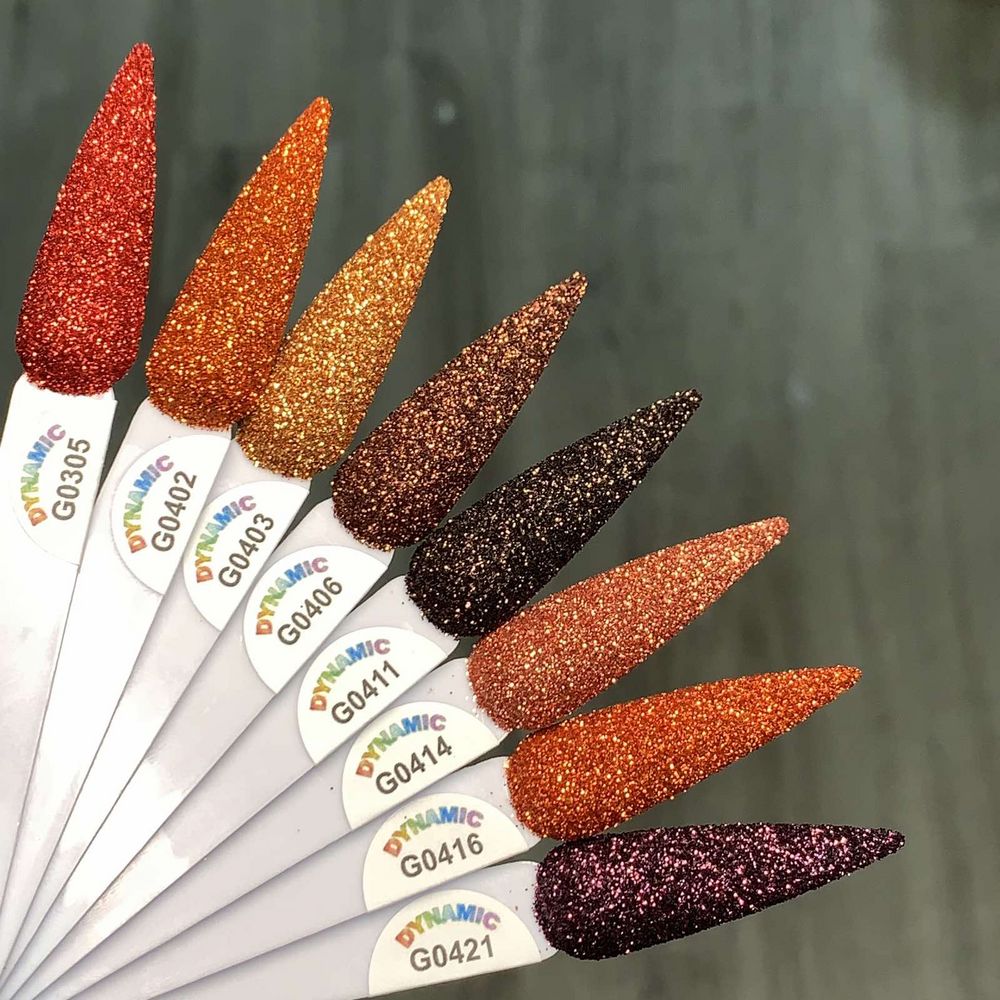
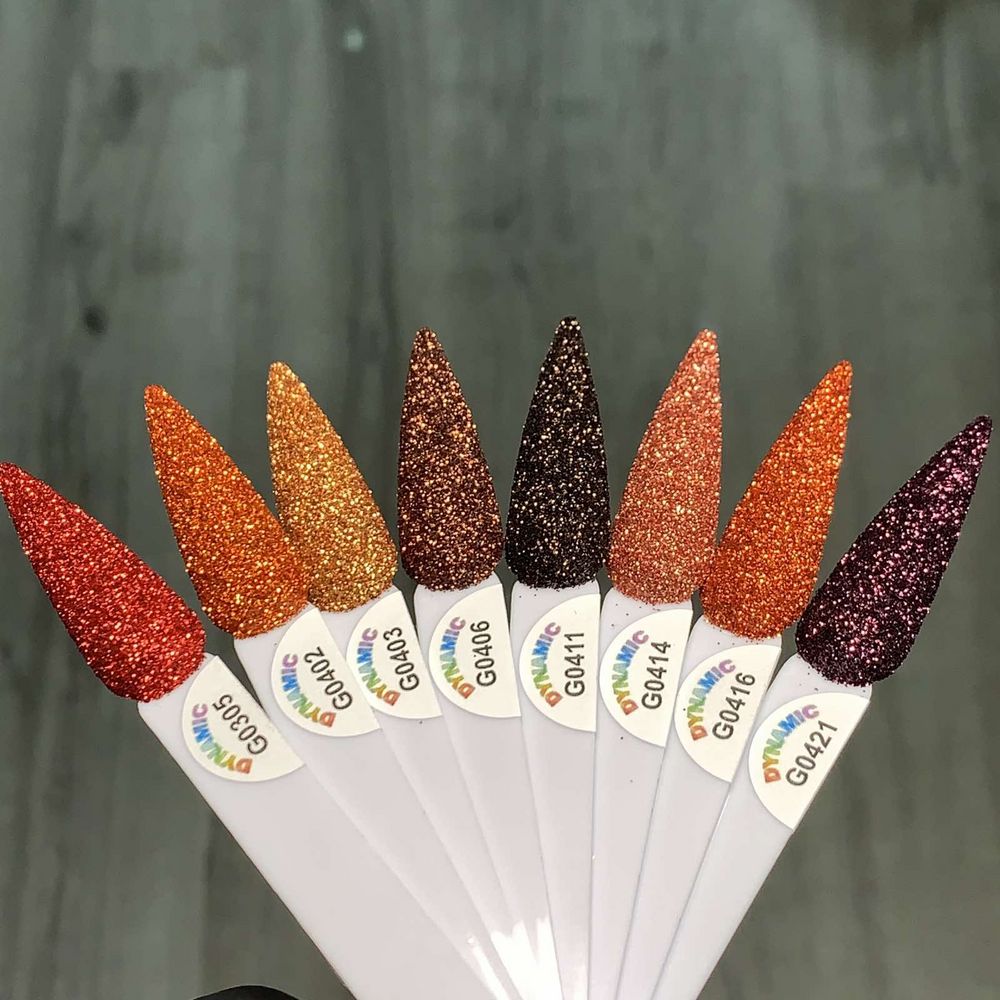
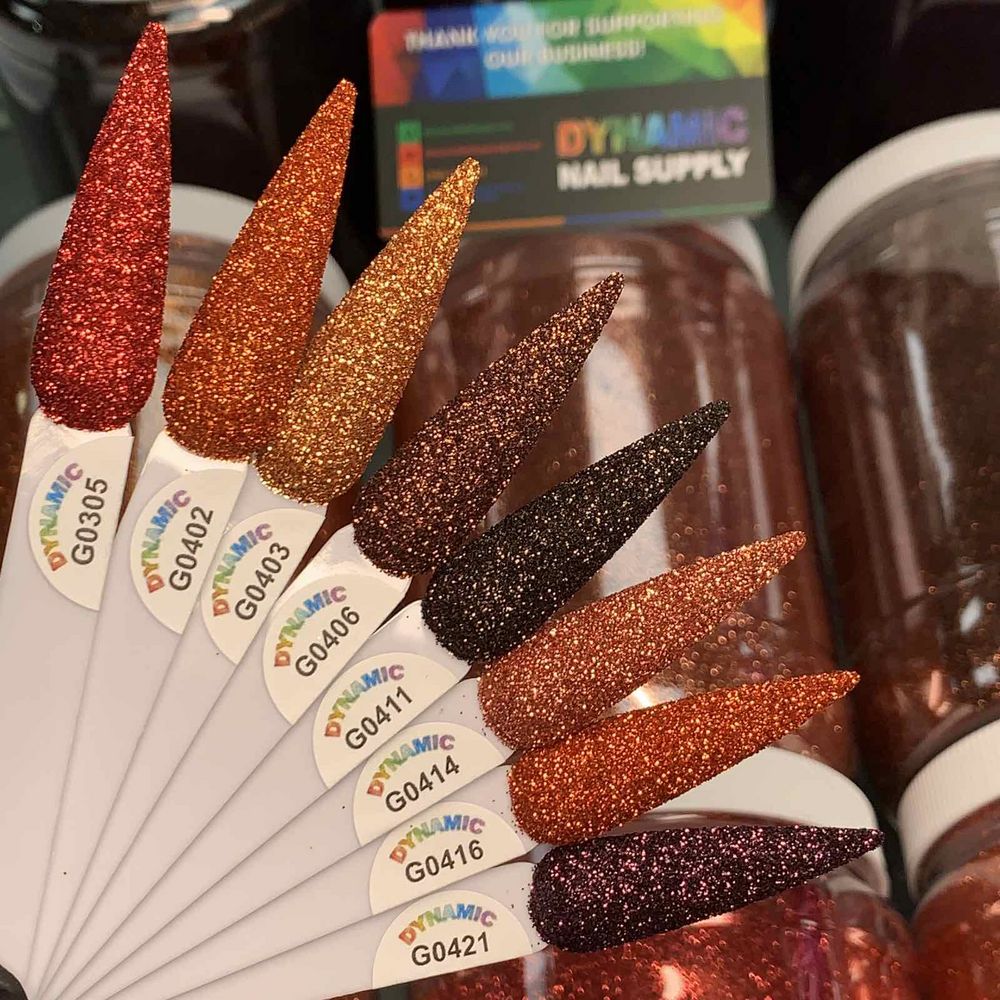
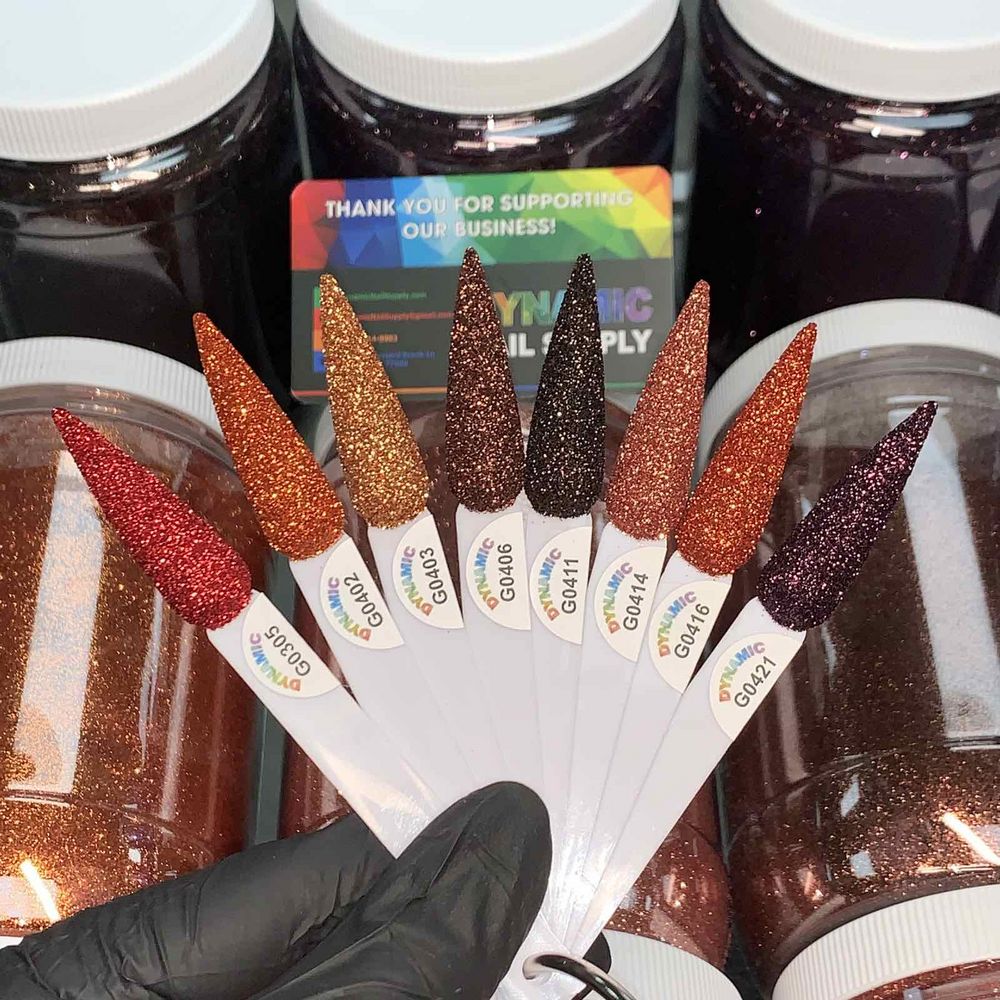
    The collection is presented in individual jars and comes in several color codes (G0305, G0402, G0403, G0406, G0411, G0414, G0416, G0421). You can pick a raw glitter jar (0.7 oz) or choose glitter already mixed with acrylic in 1 oz or 2 oz jars. Product packaging is a single jar per purchase and the powders are described as a 2-in-1 Raw Glitter / Acrylic / Dipping Powder product type.
    If you want to browse colors and sizes, check out this glitter collection.

    metallic glitter powder jars - 2

    Direct comparison: raw glitter jars vs pre-mixed acrylic

    Both formats produce glittery, seasonal looks suitable for 3-D nail art and standard overlays, but they serve different priorities.

    Raw glitter (0.7 oz jars)

    • Best for artists who mix custom ratios or add glitter to gels, topcoats or dip systems.
    • Smaller jar size keeps a broad color range on hand without overstocking large mixes.
    • Requires manual mixing time and technique to incorporate into acrylic liquid or topcoats.

    Glitter mixed with acrylic (1 oz and 2 oz jars)

    • Ready-to-use for speed: glitter is already dispersed in acrylic powder for direct application.
    • Larger sizes (1 oz and 2 oz) suit high-volume salons or technicians who prefer consistent results batch-to-batch.
    • Reduces prep time but limits customization compared with raw glitter.
    metallic glitter powder jars - 3

    Key features to consider in practice

    • Versatility: Marketed as usable for acrylic and dipping systems, so the same jar can serve multiple applications.
    • Finish: Metallic shimmer is intended for seasonal and year-round designs, including fall and winter palettes.
    • Safety and handling: The powders are described as non-toxic and low odor, which supports more comfortable salon use.
    • Origin and packaging: Made in the USA and sold in single-jar units; shipping weight is listed as about 2–3 oz depending on choice.
    metallic glitter powder jars - 4

    Practical usage tips from the workbench

    • When using raw glitter, pre-test mixing ratios on a practice nail to find the balance of sparkle and workability you prefer.
    • For acrylic overlays, pick the 1 oz or 2 oz pre-mixed jars if you need consistent, repeatable thickness without on-the-spot mixing.
    • When dipping, ensure the powder is free of clumps and use thin, even dips for smooth encapsulation; encapsulate with clear acrylic or gel to lock shimmer beneath the surface.
    • Store jars tightly closed and away from direct heat or moisture to preserve texture and prevent clumping in both raw and mixed formats.
    metallic glitter powder jars - 5

    Who should choose this product — and who might prefer something else

    Choose raw glitter if you:

    • Enjoy custom blends and layered techniques (mixing into monomer, gel, or topcoats).
    • Need a wide palette without committing to large premixed jars.
    • Work on specialty 3-D designs where precise placement of loose glitter matters.

    Choose pre-mixed glitter-acrylic if you:

    • Work in a fast-paced salon and need quick, consistent application.
    • Prefer fewer steps between powder and application — no measuring or remixing required.
    • Want larger jar sizes for frequent use: the 1 oz and 2 oz variants reduce the need to repurchase often.

    You might prefer a different product entirely if you rely exclusively on gel polish systems or want premade glitter polishes rather than powder formats. For artists seeking ultimate customization, raw glitter gives the most control; for efficiency, the pre-mixed acrylic jars are the faster route.

    metallic glitter powder jars - 6

    Care, safety notes and handling reminders

    The powders are described as non-toxic and low odor, but standard salon safety still applies: work in a ventilated area, avoid creating excess dust, and use appropriate brushes and cleansing routines. Keep containers closed between uses and out of reach of children. If you have allergies or sensitivities, perform a patch test before full application.

    metallic glitter powder jars - 7

    Conclusion — make the choice that fits your workflow

    The Sparkle Metallic Glitter Shimmer Collection Part 1 gives nail technicians a clear fork in the road: raw glitter jars for artistic flexibility and pre-mixed acrylic jars for speed and consistency. Select the 0.7 oz raw jars to expand creative options or opt for the 1 oz/2 oz pre-mixed jars when throughput and repeatability matter most. Prices range from $4.00 to $8.00 depending on format and size; actual prices may change. Available from Dynamic Nail Supply for salon and at-home pros seeking metallic shimmer in multiple formats.

  • Nail Sequins and Rivets for Summer Nail Trends

    Nail Sequins and Rivets for Summer Nail Trends

    Small metallic accents are one of the fastest ways to update a manicure for the season. A 12-grid box of varied sequins and rivets gives you instant texture and focal points—perfect for beach, festival, and minimalist metallic trends that dominate summer and early-fall looks.

    What’s inside this designer set

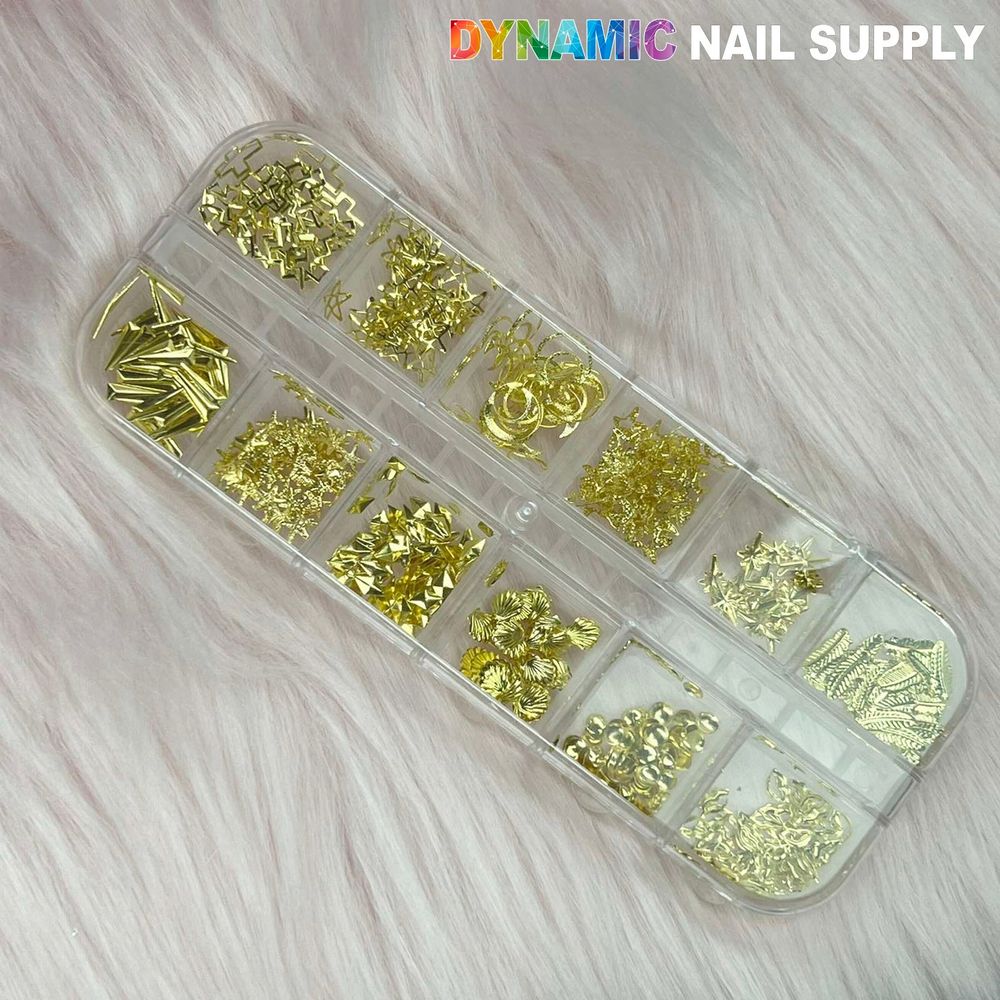
    The set comes as a 12-grid box containing an assortment of sequins and rivets in themed shapes. Included motifs range from seashells and leaves to half-moon, cross and spike styles, plus playful accents like lips. The mix lets you combine delicate shapes and stronger geometric pieces for layered, three-dimensional nail art.

    For convenience and quick selection, keep a kit on hand: the nail charms 12-grid organizes shapes and makes it easy to grab the right charm for seasonal sets.

    Trend looks to try this season

    • Sun-kissed Seashell Manicure — Use the small seashell sequins as single accent nails on a sandy beige or pearly base for a coastal-ready look.
    • Edgy Spike & Rivet Accents — Add a couple of spike rivets to a matte black or deep berry polish to give a modern grunge edge without committing to full studded nails.
    • Botanical Micro-Art — Arrange leaf sequins along the cuticle or tip over a sheer green wash to create tiny, intricate foliage designs suitable for daytime wear.
    • Moon & Minimal Metallics — Half-moon sequins paired with soft nude or cream create a refined metallic crescent at the base of the nail—on-trend and salon-ready.
    • Festival Glam — Mix lips, crosses, and small round rivets across accent nails with holographic polishes or glitter for bold, camera-ready festival sets.

    How to apply sequins and rivets like a pro

    1. Prepare the nail surface: Start with clean, dry nails. Shape and buff lightly, then apply your base color or base gel layer as usual.
    2. Placement tools: Use a wax pencil, a small dotting tool, or tweezers to pick up tiny pieces—this improves precision and speed under light.
    3. Secure the charm: Place the sequin or rivet while the top layer is still tacky—either a wet topcoat or the tacky layer of gel—so it adheres. Press gently to seat the piece flush to the nail surface.
    4. Seal and protect: Finish with a high-quality topcoat to lock charms in place. For pieces with high profile, apply two thin coats of topcoat around the edges to reduce snagging.

    Styling and pairing ideas

    Because the set contains mixed shapes, think in contrasts: pair delicate leaf sequins with a bold metallic foil, or offset a dramatic spike with a soft pastel background. For editorial photos or bridal-leaning looks, combine half-moon sequins with pearly or iridescent polishes to keep the ornamentation elegant rather than overpowering.

    Color palettes that work

    • Soft neutrals (nude, cream) to highlight metallic accents.
    • Deep jewel tones (burgundy, navy) to make spikes and rivets pop.
    • Pastels and pearlescent shades for delicate shapes like leaves and seashells.

    Who this set is for

    This designer set suits nail professionals who want a compact, varied charm selection for seasonal client requests, as well as DIYers building a creative stash. The 12-grid format makes it easy to keep multiple shapes on hand for quick accent work, editorial nail shoots, or festival bookings.

    Care and practical safety notes

    • Store the sequins and rivets in the original grid box to avoid mix-ups and to protect delicate pieces from bending.
    • Keep out of reach of small children and pets—these are small items and may pose a choking hazard.
    • Avoid placing charms over irritated or broken skin. If you notice lifting, remove the piece and reapply after the nail surface has recovered.
    • Use clean tools when handling sequins and rivets to prevent contamination of the supply and maintain a professional station.

    Quick buying note and conclusion

    The set is offered at an accessible price point—currently $6.00—so it’s simple to stock multiple designs for seasonal changes; prices may change. If you need supplier details or have questions about the product, the seller provides contact information and social handles for follow-up.

    Whether you’re creating sun-soaked beach nails, edgy urban sets, or delicate botanical accents, a varied sequin and rivet box expands your seasonal toolkit. Keep it organized, experiment with placement, and let small metallic details turn a simple mani into a memorable look.

  • Logo Nail Stickers: Choose Them or Alternatives

    Logo Nail Stickers: Choose Them or Alternatives

    Small details can shift a manicure from plain to polished in minutes. Logo nail stickers are a popular way to add a branded or graphic accent without hours of freehand painting. This guide helps you decide whether a single sheet of logo nail stickers is the right choice for your next look — and when another method might serve better.

    What logo nail stickers are and what to expect

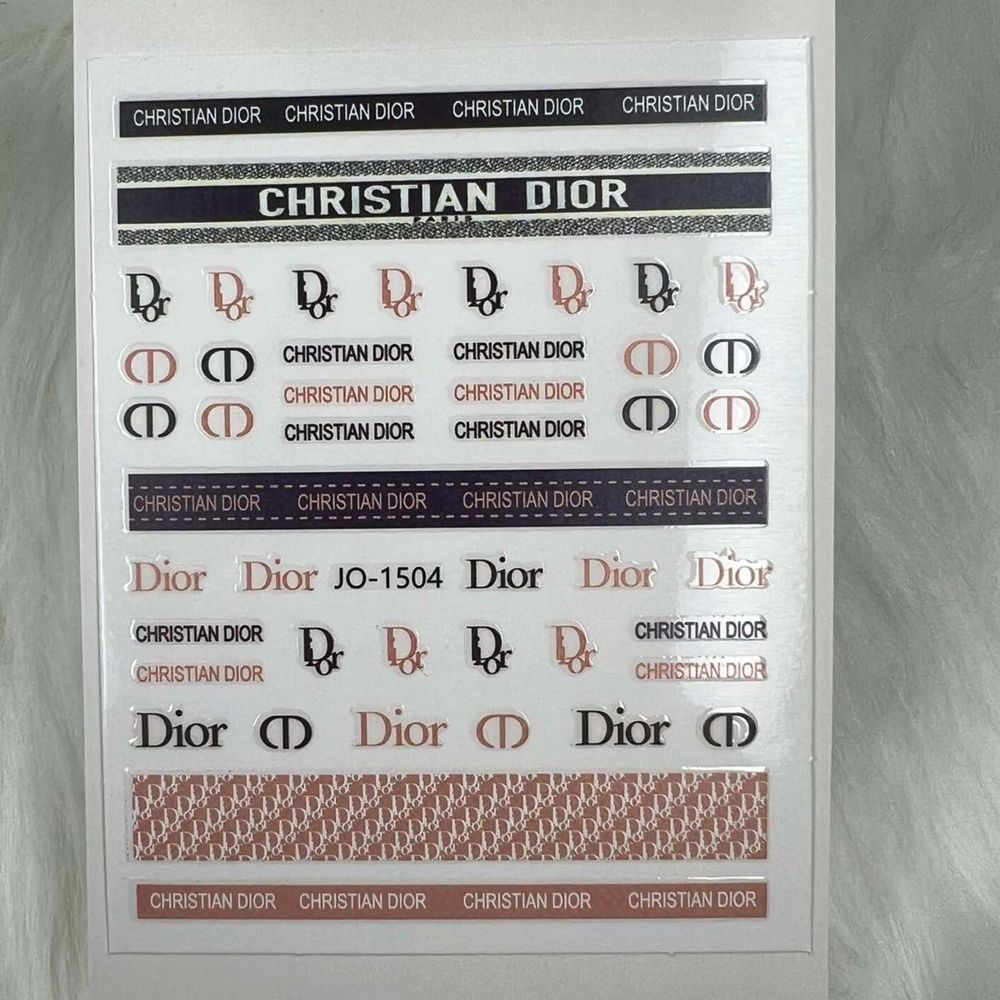
    At their simplest, these are adhesive decals designed to sit on natural nails or over polish. The product title indicates a logo-themed design, sold as a nail sticker under the Nail Sticker category. The vendor lists it for a low-cost purchase: priced at $1.99, though prices may change.

    Key features in context

    • Easy single-step application: the sticker format lets you lift and apply a graphic to a nail with minimal tools.
    • Designed for accents: logo stickers work best as focal points, such as a single accent nail or paired with simple polish.
    • Low commitment: stickers are an entry-level way to try a design without long-term alteration to the nail.

    How to apply logo nail stickers

    Application is straightforward and makes these stickers an attractive option for quick manicures. A typical process:

    1. Prepare the nail surface by cleaning and drying.
    2. Peel a sticker from its backing and position it on the nail, smoothing out any edges.
    3. Trim or file excess material along the nail edge if needed and optionally seal with a clear top coat for added hold.

    Because the product description emphasizes a peel-and-place approach, this method keeps application time short and predictable.

    Who should choose logo nail stickers

    Logo nail stickers are an efficient pick for people who want instant, on-trend accents without advanced tools or skills. If you need a quick spot of brand-style flair for a one-off event, a single logo nail sticker like logo nail sticker can be applied in minutes and removed when you’re ready. They’re also useful for technicians who need a fast add-on service or for DIYers experimenting with small graphic elements.

    When to consider other options instead

    Logo stickers aren’t the best solution in every case. Consider alternatives if any of the following apply:

    • Long-term durability: If you need a design that must endure heavy wear for weeks, professional nail wraps or hand-painted art with nail polishes and gels tend to last longer when done and sealed correctly.
    • Custom sizing or fit: Stickers come in preset shapes and may not conform perfectly to every nail; freehand art or custom decals offer more tailored coverage.
    • High-end authenticity concerns: If official branding or licensed products are required, verify provenance; tags on this item associate it with logo-style designs but do not imply any specific licensing details.

    Practical tips for best results

    • Prep matters: Clean, dry nails give stickers the best initial adhesion. Remove oils or lotions before applying.
    • Trim and file carefully: After placement, gently trim or file any overhang to avoid early peeling.
    • Seal when desired: A thin layer of clear top coat can smooth edges and extend wear for those who want a longer-lasting finish.
    • Mix with simple styles: Use logo stickers as accent pieces against neutral polish shades to let the graphic stand out without competing with busy backgrounds.

    Care, removal and safety notes

    Removal should be gentle to avoid damaging the nail plate. Soak or soften the sticker edge with warm water or a nail polish remover if needed, then lift slowly from one side. Avoid aggressive scraping. As with all cosmetic nail products, discontinue use if you notice irritation or allergic reaction.

    Final comparison and recommendation

    Logo nail stickers are a low-cost, low-effort way to introduce branded or graphic accents into a manicure, ideal for quick changes and short-term looks. If you value speed, simplicity and affordability, this nail sticker option is a smart pick. If you need extended durability, a tailored fit, or verified brand licensing, explore professional application methods or specialized decals instead. For a fast accent you can apply at home or in the salon, these stickers deliver an uncomplicated solution.

    Sold through Dynamic Nail Supply, this product is an accessible entry point to logo-style nail art; the modest price makes it easy to experiment without a big investment.

  • Fall Trend: Animal Skin Nail Foils for Modern Manis

    Fall Trend: Animal Skin Nail Foils for Modern Manis

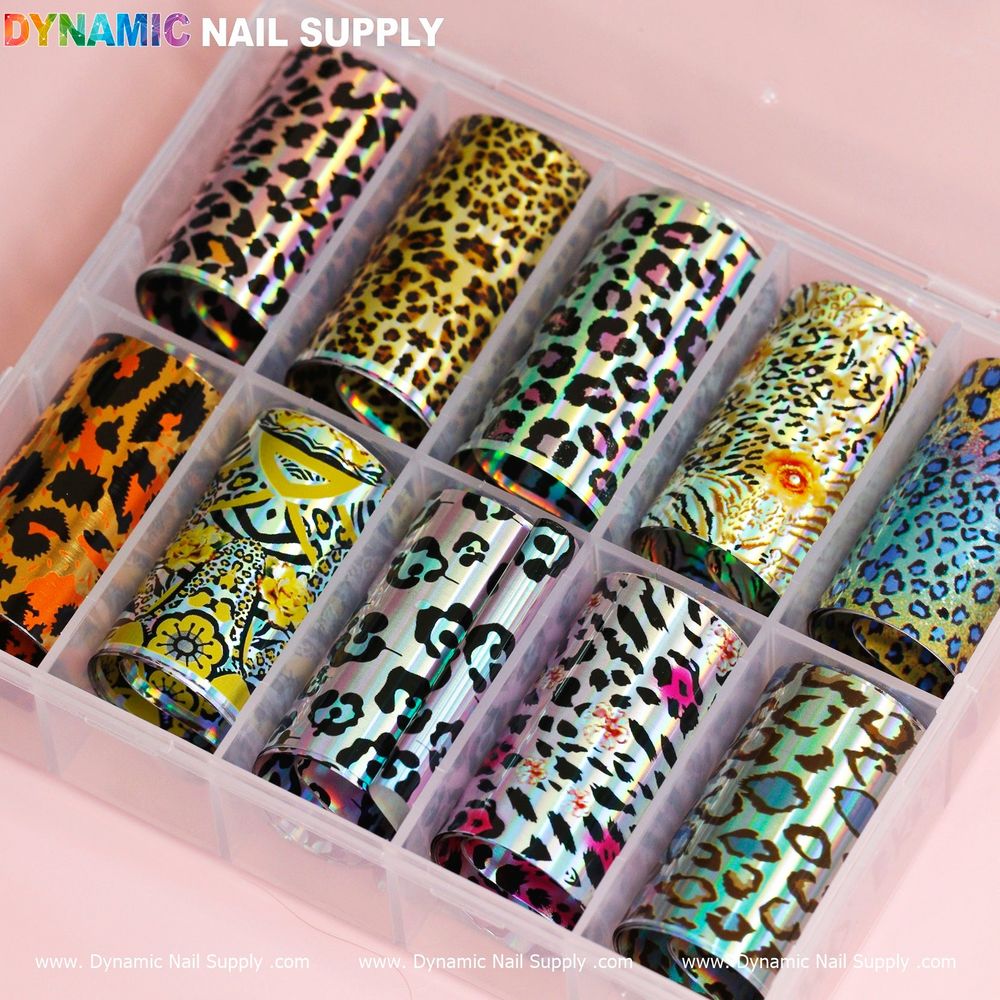
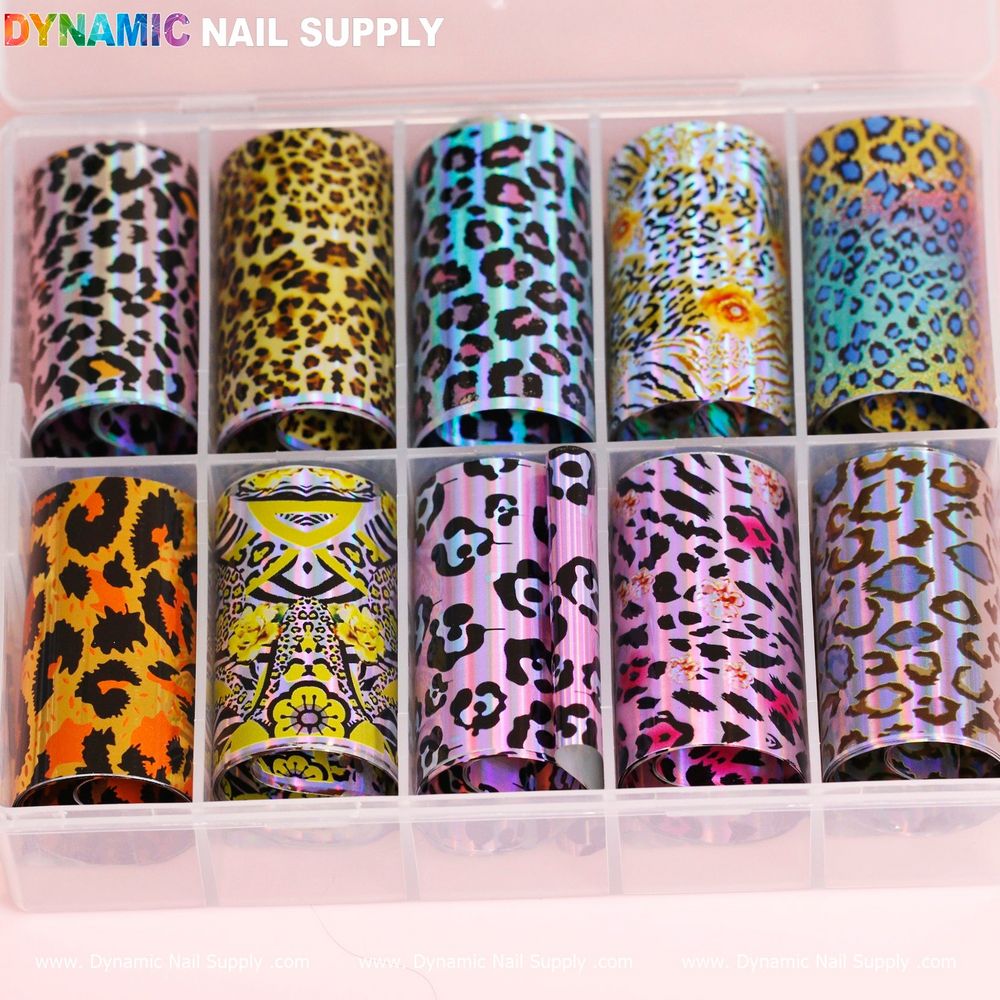
    Animal-inspired prints are back on runways and street style—this season they translate perfectly to nails. Animal skin nail foils offer an easy way to add bold pattern, contrast and texture without complex hand-painting.

    For a quick pick, check the nail foil animal skin from Dynamic Nail Supply.

    Why animal skin patterns are seasonal must-haves

    Each season shifts the palette and scale of prints. Right now, clients are asking for statement accents and wearable maximalism: think a single patterned accent nail paired with muted neutrals or matte finishes. Animal skin prints give that instant drama while remaining versatile enough to pair with metallics, deep autumn tones or crisp winter whites.

    animal skin nail foils sheets - 2

    What these foils bring to your kit

    • Instant pattern: Skip freehand painting—foil transfers deliver repeatable animal motifs in seconds.
    • Design variety: Use them for accents, full-coverage transfers or chopped pieces layered over color.
    • Cost-effective: At an accessible price point, these foils are an economical way to expand seasonal offerings.

    Step-by-step: Applying animal skin nail foils

    Foil application methods vary by adhesive and base used, but the following sequence covers common salon workflows and produces clean, long-lasting results.

    1. Prep: Shape nails, push cuticles and remove dust. A clean base ensures the foil adheres smoothly.
    2. Base color: Apply and cure (if using gel) or dry a color that complements the print—black, tan, rust or ivory are classic choices.
    3. Adhesive layer: Apply a foil adhesive or tacky gel top layer as directed by the product manufacturer.
    4. Transfer: Press the patterned side of the foil onto the tacky surface, rub firmly, then lift to reveal the design.
    5. Seal: Finish with an appropriate topcoat to lock the foil in place and smooth edges.

    Seasonal looks to try (quick ideas)

    • Autumn Accent: Matte espresso base with a single glossy animal skin accent nail for contrast.
    • Layered Luxe: Metallic bronze under the foil for a warm, dimensional effect ideal for holiday events.
    • Neutral Mix: Soft beige, ivory and thin foil fragments for a subdued, editorial vibe.
    • Edge Frame: Apply foil only along the free edge or create a french-style animal tip for subtle impact.

    Pro tips for salon-speed results

    • Prep matters: Removing oils and buffing lightly helps the foil make full contact.
    • Control coverage: Use small scissors to cut pieces of foil for partial designs—this reduces waste and speeds application.
    • Combine textures: Pair glossy foils with matte topcoats on neighboring nails to create contrast without additional painting.
    • Edge finishing: After sealing, tiny trims around the cuticle and free edge keep the look neat and professional.

    Who should add these foils to their offerings?

    Animal skin nail foils suit a wide range of users: salon owners seeking fresh seasonal add-ons, nail technicians wanting fast statement options, and DIYers who prefer sticker-like transfers over intricate painting. Because the pattern does most of the work, these foils are especially useful for busy services like express mani upgrades or themed promo packages.

    Care, removal and safety notes

    To maximize wear, always seal foil transfers with a compatible topcoat. For removal, soften with an appropriate soak-off method if the system requires it, and avoid forceful peeling which can damage the natural nail. Keep foils and adhesives out of reach of children and store sheets flat and dry to preserve adhesion performance.

    Final thoughts

    Animal skin nail foils are a seasonal shortcut to bold, repeatable designs that clients love. They work as a stand-alone statement or as a mix-and-match accent across a full set, making them a flexible tool in any nail professional’s kit. Priced accessibly, they’re a simple way to refresh your seasonal menu and give clients runway-ready looks with minimal extra time.

  • Vintage Religious Nail Stickers for Seasonal Nail Trends

    Vintage Religious Nail Stickers for Seasonal Nail Trends

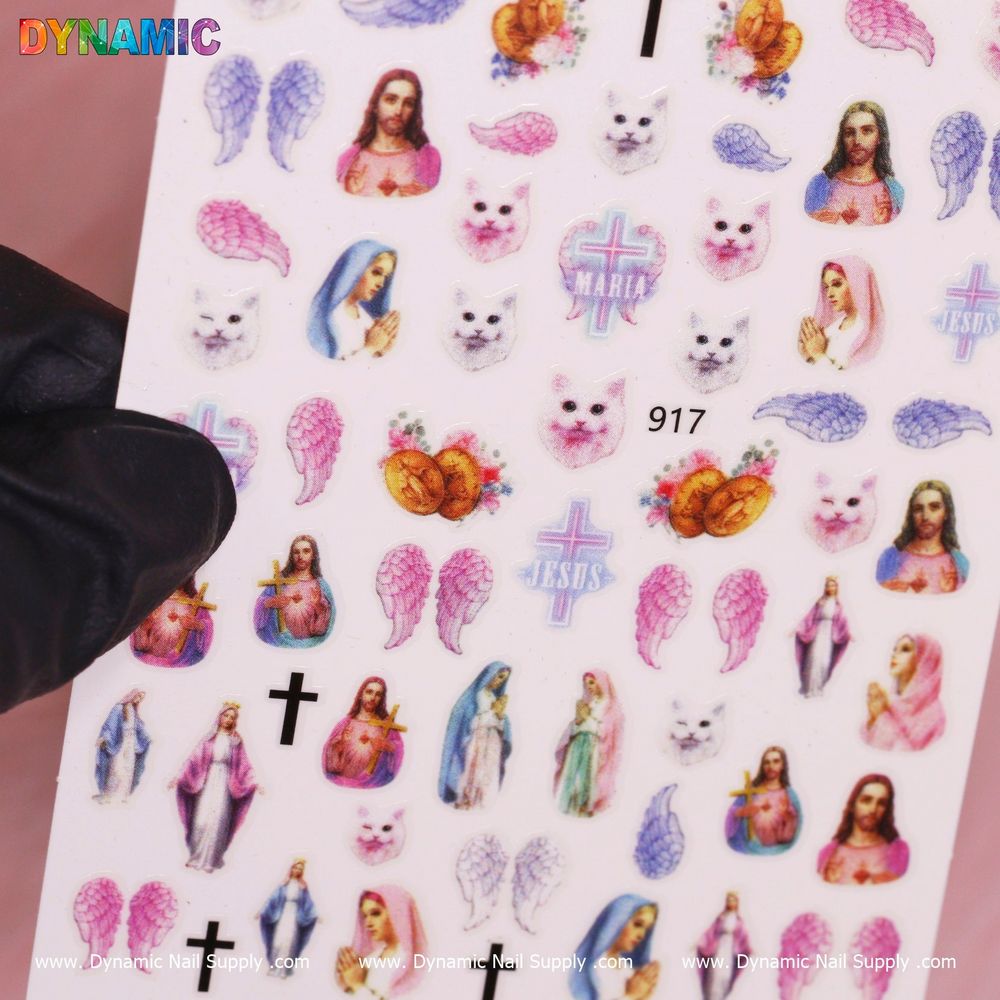
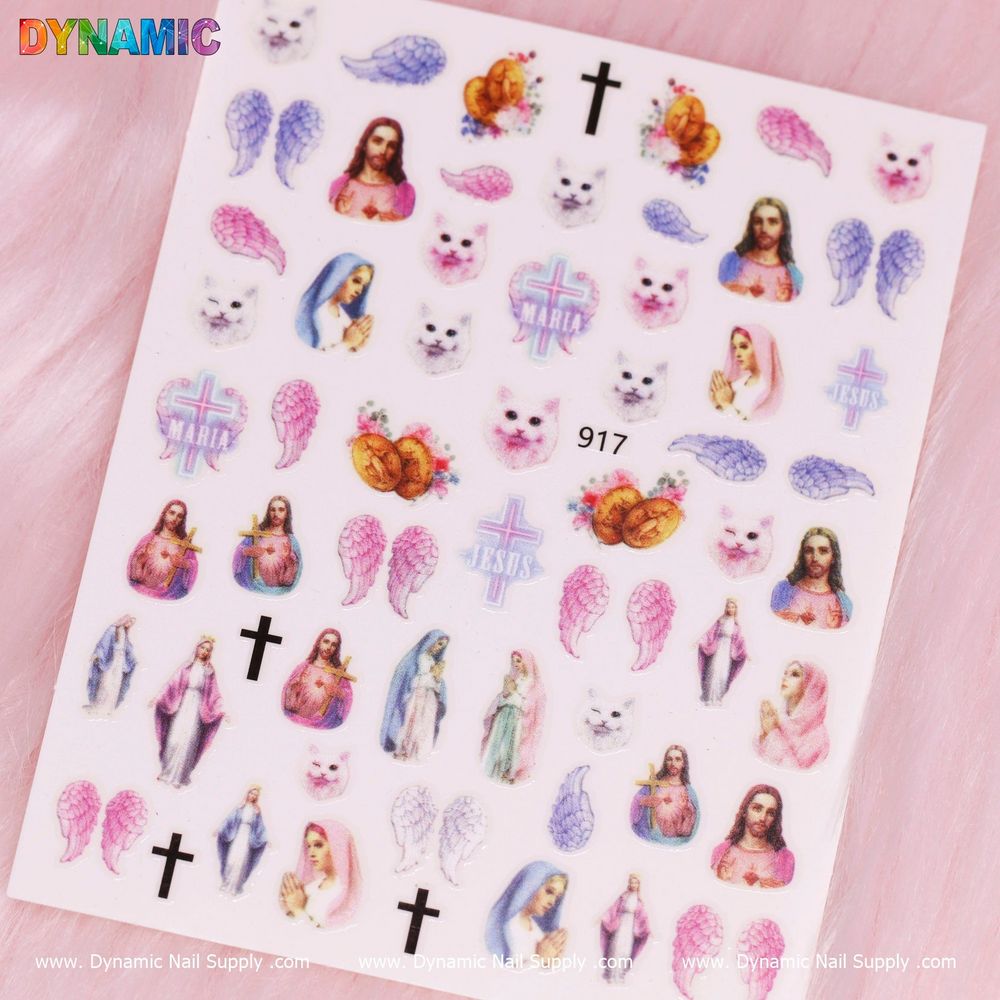
    Religious imagery is back on nails as a stylish, nostalgic accent this season. The Jesus and Mary and Angel Wings (917) nail stickers bring classic iconography—Jesus, Mary, angel wings and vintage roses—into wearable, manicure-friendly decals that slot into many current looks, from chapelcore to retro revival.

    Because these are sticker-style nail decorations, they’re quick to use for both salon clients and at-home mani lovers. Explore these religious nail stickers for inspiration and to see how the motifs translate onto different base colors and finishes.

    Why these stickers fit current trends

    Design trends are favoring meaningful, small-format art on nails: religious and vintage motifs, delicate florals, and iconography that reads like a tiny tattoo. These stickers match that demand by combining Christian imagery with a vintage aesthetic. They pair especially well with muted tones, matte finishes, and layered accents—styles that are prominent in seasonal editorials and streetwear-adjacent nail art.

    Jesus Mary angel wings nail stickers - 2

    Seasonal styling ideas

    Autumn / Early Winter

    • Base: deep burgundy, olive, or charcoal matte polish.
    • Placement: center or just off-center on ring and middle fingers for a moody focal point.
    • Finish: seal with a satin or matte top coat, or add a thin edge of metallic gold foil for a ritualistic, heirloom feel.

    Spring / Summer

    • Base: sheer pinks, soft beige, or pastel blue to make the vintage roses and figures pop.
    • Placement: tiny decals near the cuticle or along the side edge for a whimsical, delicate touch.
    • Finish: glossy top coat to emphasize color contrast and give a fresh, modern look.

    Modern Religious-Chic

    • Mix iconography across nails—Jesus on one finger, Mary on another, angel wings as accents—to create a curated, editorial set.
    • Combine with negative-space or French tips for a contemporary balance between classic imagery and minimalist shapes.

    How to apply for best results

    • Prepare: start with clean, dry nails and a smooth base coat or polish. Thin polishes allow the sticker art to remain crisp.
    • Placement: use tweezers or a flat cuticle stick to lift and position the decal precisely where you want it.
    • Adhere: press down from center outward to remove any air bubbles and ensure contact at the edges.
    • Seal: finish with a clear top coat to lock the sticker in place and increase longevity; for layered looks, use multiple thin layers rather than one thick coat.

    Key features in context

    • Icon motifs: The sheet includes classic Christian figures—Jesus and Mary—and angel wings, which act as focal art on short or long nails.
    • Vintage styling: The rose and retro design cues make these stickers ideal for nostalgic or vintage-inspired manicures.
    • Sticker format: Ready-to-apply nail decals are time-saving and versatile for both quick touch-ups and full nail art sets.

    Who will love these stickers?

    These decals are well suited to nail technicians and DIY mani fans who want to add story-driven imagery to their work without hand-painting. They also appeal to people who enjoy faith-inspired fashion statements, vintage aesthetics, or thematic seasonal sets. Salon owners can use them to create themed client options quickly, while at-home users get a low-effort way to try niche iconography.

    Care and safety notes

    • Keep sheets flat and stored away from direct sunlight to preserve color and adhesive quality.
    • Apply and remove using standard nail-care procedures. Use an appropriate polish remover when removing the sticker and follow with nail oil or moisturizer to rehydrate the nail plate.
    • As with any decorative nail product, avoid contact with eyes; if irritation occurs, discontinue use and seek guidance.

    Styling extras and pro tips

    1. Layer a thin dusting of glitter or micro-foil under the sticker for a halo effect around angel wings.
    2. For short nails, crop motifs by trimming around the image before application so the key details remain visible.
    3. Mix with plain metallic studs or small pearls to create a chapelcore-inspired cluster on a single accent nail.

    These stickers are affordably priced at $2.00 per set, making them a low-commitment way to experiment with religious and vintage visuals. Available from Dynamic Nail Supply, they’re a practical choice for trend-driven seasonal manicures.

    Whether you lean into a full religious-chic set or use a single motif as a statement accent, vintage religious nail stickers like Jesus and Mary and Angel Wings (917) offer an easy way to introduce meaningful art into current nail trends. Try contrasting finishes and placements to see which seasonal look speaks to you.

  • Roman Letter and Number Stickers: Salon Buyer’s Guide

    Roman Letter and Number Stickers: Salon Buyer’s Guide

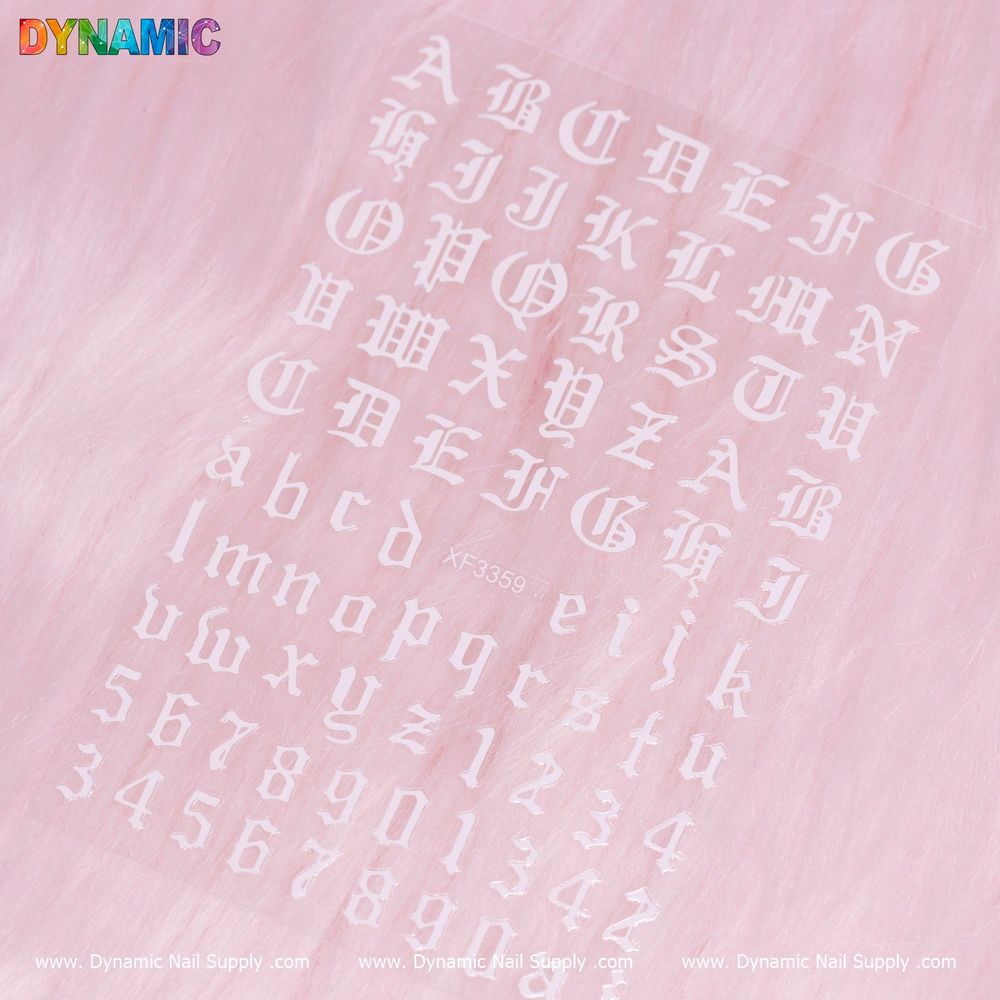
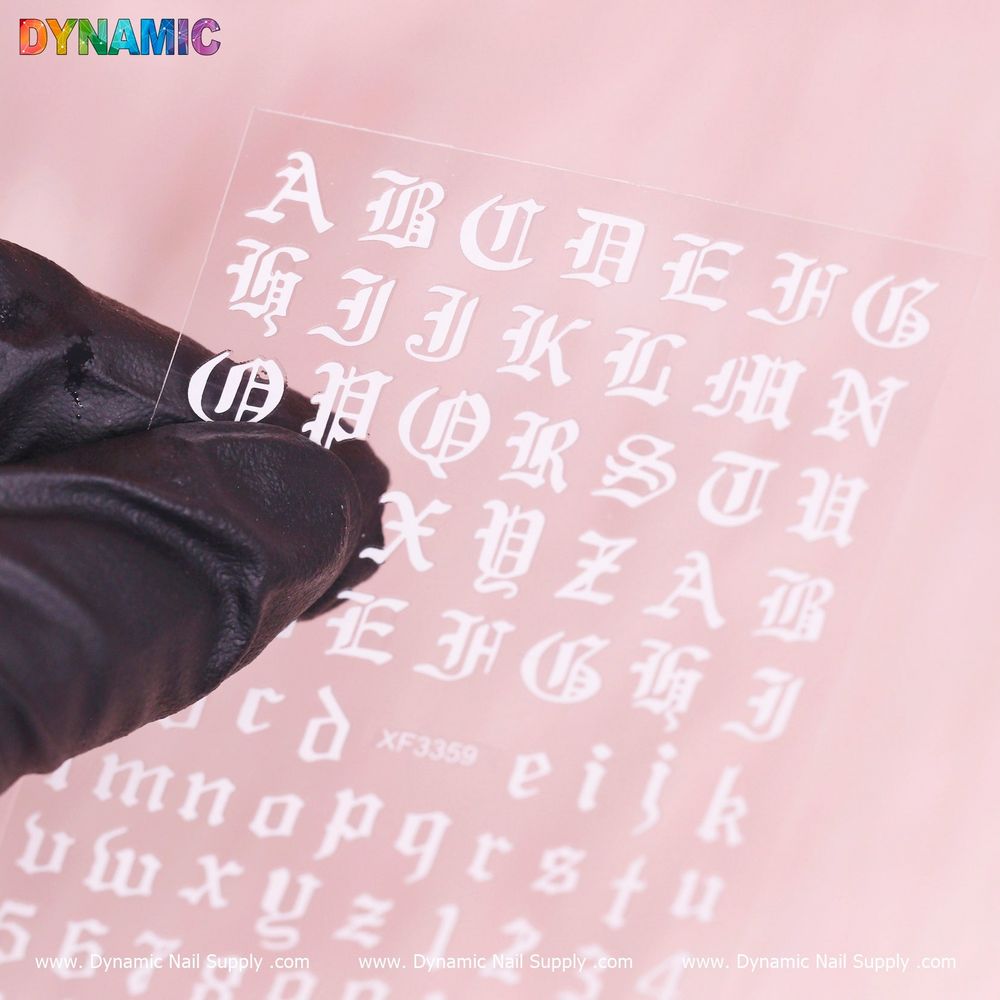
    Nail technicians and salon owners often need small, reliable accents that speed service and expand creative options. White Roman letter and number stickers are a compact, affordable way to add initials, monograms, dates, or subtle numeric details without long setup or custom tooling.

    These decals come in a ready-to-use sticker format that fits many styles and lengths of nail work. If you want a quick inventory option for custom initials or dates, order these Roman letter stickers to keep a steady supply on hand.

    What these stickers are and when to use them

    Roman letter and number stickers are pre-cut white characters designed to be applied to finished nail surfaces. They work well when you want precise, uniform typography—think client initials, wedding dates, anniversaries, or themed sets that use Roman characters for a classic look.

    white roman letter and number stickers - 2

    Key features in a salon context

    • Lettering and numbers: Includes both Roman letters and numerals for flexible personalization.
    • White finish: The color provides strong contrast on darker polishes and a soft, clean look on lighter backgrounds.
    • Sticker format: Ready to apply—no cutting or special equipment required to begin using them in services.
    • Cost-effective: Priced affordably, suitable for stocking multiple sets in a busy salon; current price listed is $2.00 but may change.

    Design and application tips for technicians

    To keep application smooth and professional, follow simple workflow habits that work across decal types:

    • Work on a clean, dry nail surface—apply over cured polish or a sealed base for best adhesion.
    • Use tweezers or a sticky wax tool to pick up and position characters precisely; these stickers are small and benefit from steady placement.
    • Press gently to seat the sticker and smooth any edges so it sits flush with the nail plane.
    • Seal with a compatible topcoat to lock the sticker in place and protect it from daily wear. A thin, even layer is usually best to avoid bubbling or visible ridges.
    • For layered or multi-element designs, plan the placement order so the topcoat can seal all components evenly.

    Creative ways to use Roman letters and numbers

    • Initials and monograms: Create discreet signature nails or full sets with client initials.
    • Special dates: Anniversaries, birthdays, or wedding dates look elegant in Roman numerals or letters.
    • Themed sets: Combine letters/numbers with metallic accents, negative space, or minimal geometric designs for modern looks.
    • Branding: Use simple lettering for boutique salon branding on a single accent finger in promotional sets or photoshoots.

    Who should stock these stickers

    These Roman letter and number stickers are a practical purchase for:

    • Independent nail technicians who want quick personalization options without custom decal printing.
    • Busy salons that need small, consistent accents to add value to services with minimal time investment.
    • Mobile nail artists and event technicians who require lightweight, easy-to-carry decoration supplies.

    Care, removal and client-safety notes

    Although these decals are straightforward to use, handling and removal should remain gentle to protect the natural nail and client comfort:

    • Avoid aggressive scraping or picking—train staff to remove stickers with appropriate salon removal techniques.
    • When sealing, apply topcoat evenly and allow full curing or drying time to prevent lifting.
    • If a client has adhesive sensitivities, perform a quick consultation and spot-check before full application.

    Stocking tips and buying considerations

    Keep a few sets on hand in neutral white for the most versatility. Store sheets flat and away from heat or moisture to preserve handling. If you want consistent replenishment for a busy practice, note the SKU or product code when reordering. These stickers are commonly sold through professional distributors; one source is Dynamic Nail Supply.

    Short conclusion

    White Roman letter and number stickers are an inexpensive, flexible tool for adding refined typographic accents to nail services. They save time, broaden design options, and are easy to integrate into regular salon workflows—especially useful for personalization and special-occasion requests.

  • Luxury Nail Water Decals — Beginner’s Step-by-Step Guide

    Luxury Nail Water Decals — Beginner’s Step-by-Step Guide

    Want salon-style designer nails without a long appointment? Luxury nail water decals offer a fast, low-cost way to add intricate patterns and brand-inspired looks to manicures. This guide breaks down key terms and walks a beginner through each step, from prep to finish.

    What are water decals and how do they differ?

    Water decals are thin printed designs on a carrier film that release when briefly soaked in water. Unlike peel-and-stick stickers, water decals are handled wet and slide off their backing, allowing you to position the design precisely on the nail surface. They’re commonly used as nail stickers for quick detailed art that would otherwise require freehand painting or stamping.

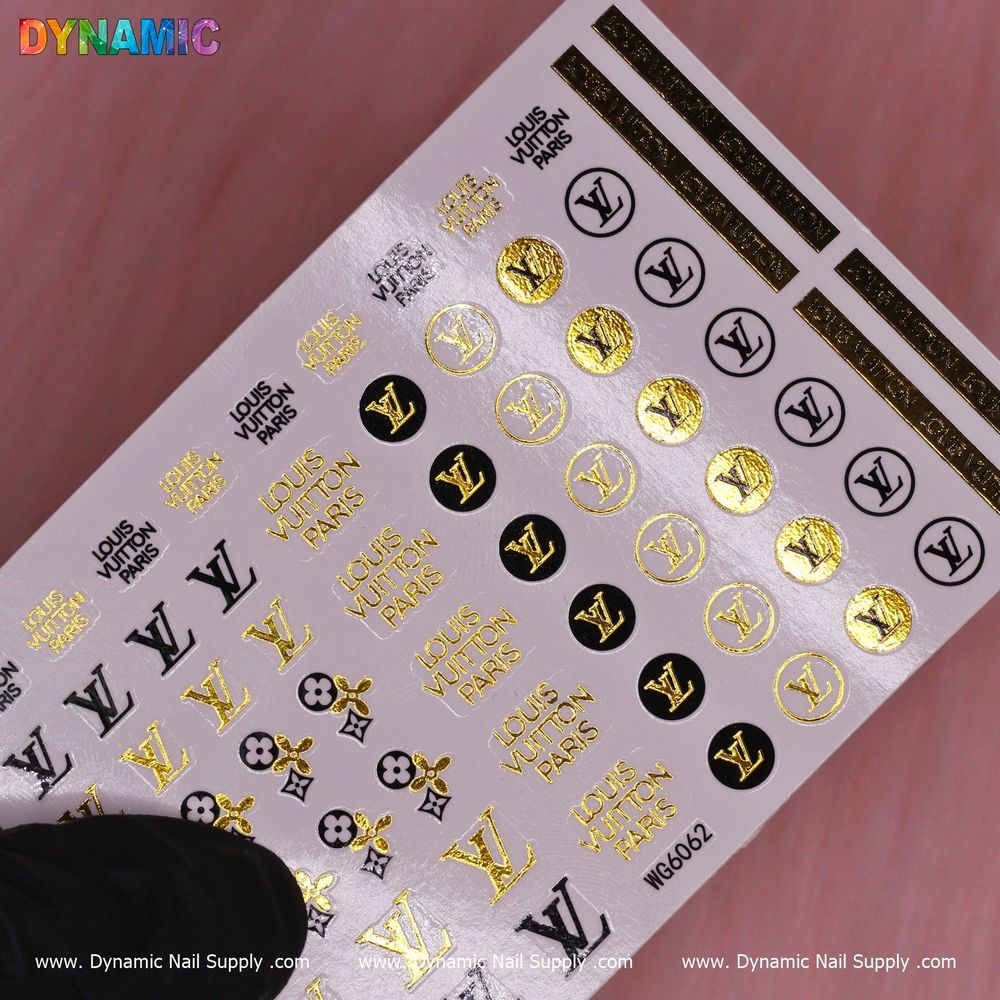
    Luxury water nail decal WG6062 - 2

    Key terms a beginner should know

    • Carrier film: the clear, thin backing that holds the printed design until you wet and slide it off.
    • Decal: the printed image itself, which transfers to the nail.
    • Top coat: the protective polish layer applied over the decal to seal and protect it.
    • Edge smoothing: pressing and sealing the decal edges so they don’t lift.

    Before you start: simple prep

    Good results begin with basic nail prep. File and shape nails, push back cuticles, and remove oils or residue with a nail polish remover or wipe. A smooth, dry polish base (or cured gel base) gives the decal something clean to adhere to. If you prefer natural nails, a sheer base coat works too.

    Step-by-step application for beginners

    1. Cut and size:

      Trim the decal close to the design and place it over the nail to estimate fit. It’s easier to work with slightly oversized pieces you can trim later.

    2. Soak the decal:

      Using clean water (room temperature is fine), submerge the decal for a few seconds until the film begins to release from the backing. Time varies by decal thickness—watch for the edges to lift.

    3. Slide onto the nail:

      Carefully slide the design off its backing and onto the nail. Use tweezers or a damp brush for control. Position the decal before it dries.

    4. Smooth and remove bubbles:

      Gently press from center to edges with a silicone tool, cotton swab, or finger to remove water and bubbles. Blot excess moisture with a lint-free wipe.

    5. Trim and tidy:

      After the decal is mostly dry, file or trim any overhang at the free edge. Use a fine file and light strokes to avoid lifting the design.

    6. Seal with a top coat:

      Apply one or two thin layers of a clear top coat to seal the design and add durability. Allow drying between coats. For gel top coats, follow the product’s curing instructions if you use them.

    Practical tips for neater results

    • Work on one nail at a time so the decal doesn’t dry before placement.
    • Use small scissors and a nail file to customize shapes for smaller nail beds.
    • If edges lift later, press and reseal with a drop of top coat or clear builder gel in a salon setting.
    • Keep tools and hands dry when placing decals to avoid sliding or wrinkling the design.

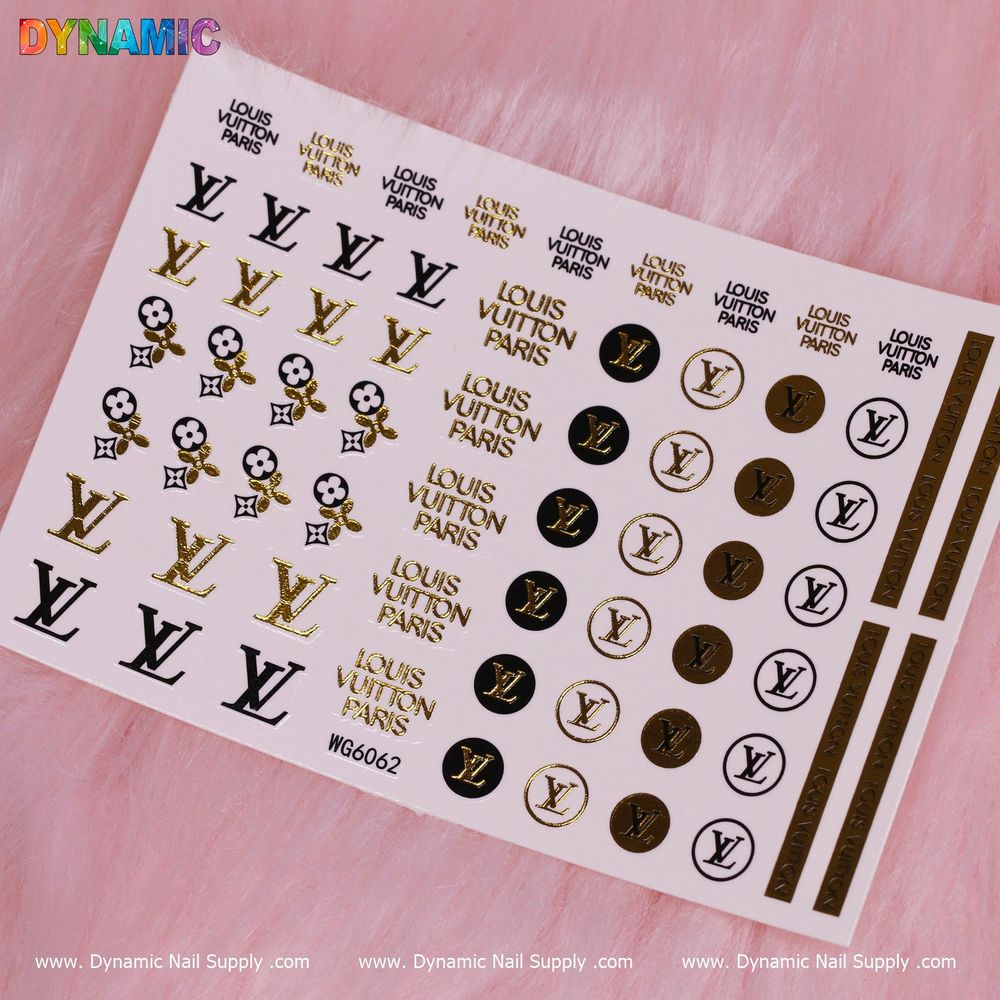
    For an affordable, designer-inspired option, consider the Luxury Style Water Decal (WG6062); see luxury nail water decals sheet for the specific sheet and design details.

    Key features in context

    This product is a sticker-style water decal marketed as luxury or designer-inspired nail art. It’s offered as an economical single-item option — priced at $2.00 — making it an approachable choice for beginners and frequent DIYers. The thin, water-activated film lets you achieve fine detail without painting complex motifs by hand.

    Who should use luxury nail water decals?

    These decals suit a range of users: complete beginners who want instant designer flair, hobbyists building a nail-art toolkit, and busy technicians needing a fast decorative option between clients. They’re also useful for trialing a look before committing to more permanent or costly methods.

    Care and safety notes

    • Store decal sheets flat and away from heat or direct sunlight to prevent curling or fading.
    • Avoid applying to irritated or broken skin. If irritation occurs, remove the decal and top coat and rinse the area.
    • Keep small sheets and tools away from children and pets to prevent ingestion or choking hazards.
    • Use non-acetone removers for gentle removal when possible; thicker or cured top coats may require soaking or professional removal methods.

    Final thoughts

    Luxury nail water decals are a quick, low-cost way to achieve complex patterns and a designer look without advanced painting skills. With simple prep, careful placement, and a good top coat, beginners can create polished, salon-quality results at home. If you’re experimenting with nail art basics, a single sheet like WG6062 is an easy first step — try one to see how water decals fit into your routine.

    Available from Dynamic Nail Supply and priced affordably, these decals are a practical addition to any nail-art starter kit.